Christmas quilt top and block pattern
Doesn’t Woody the fence look festive? The Christmas quilt top is done, and I’m celebrating!

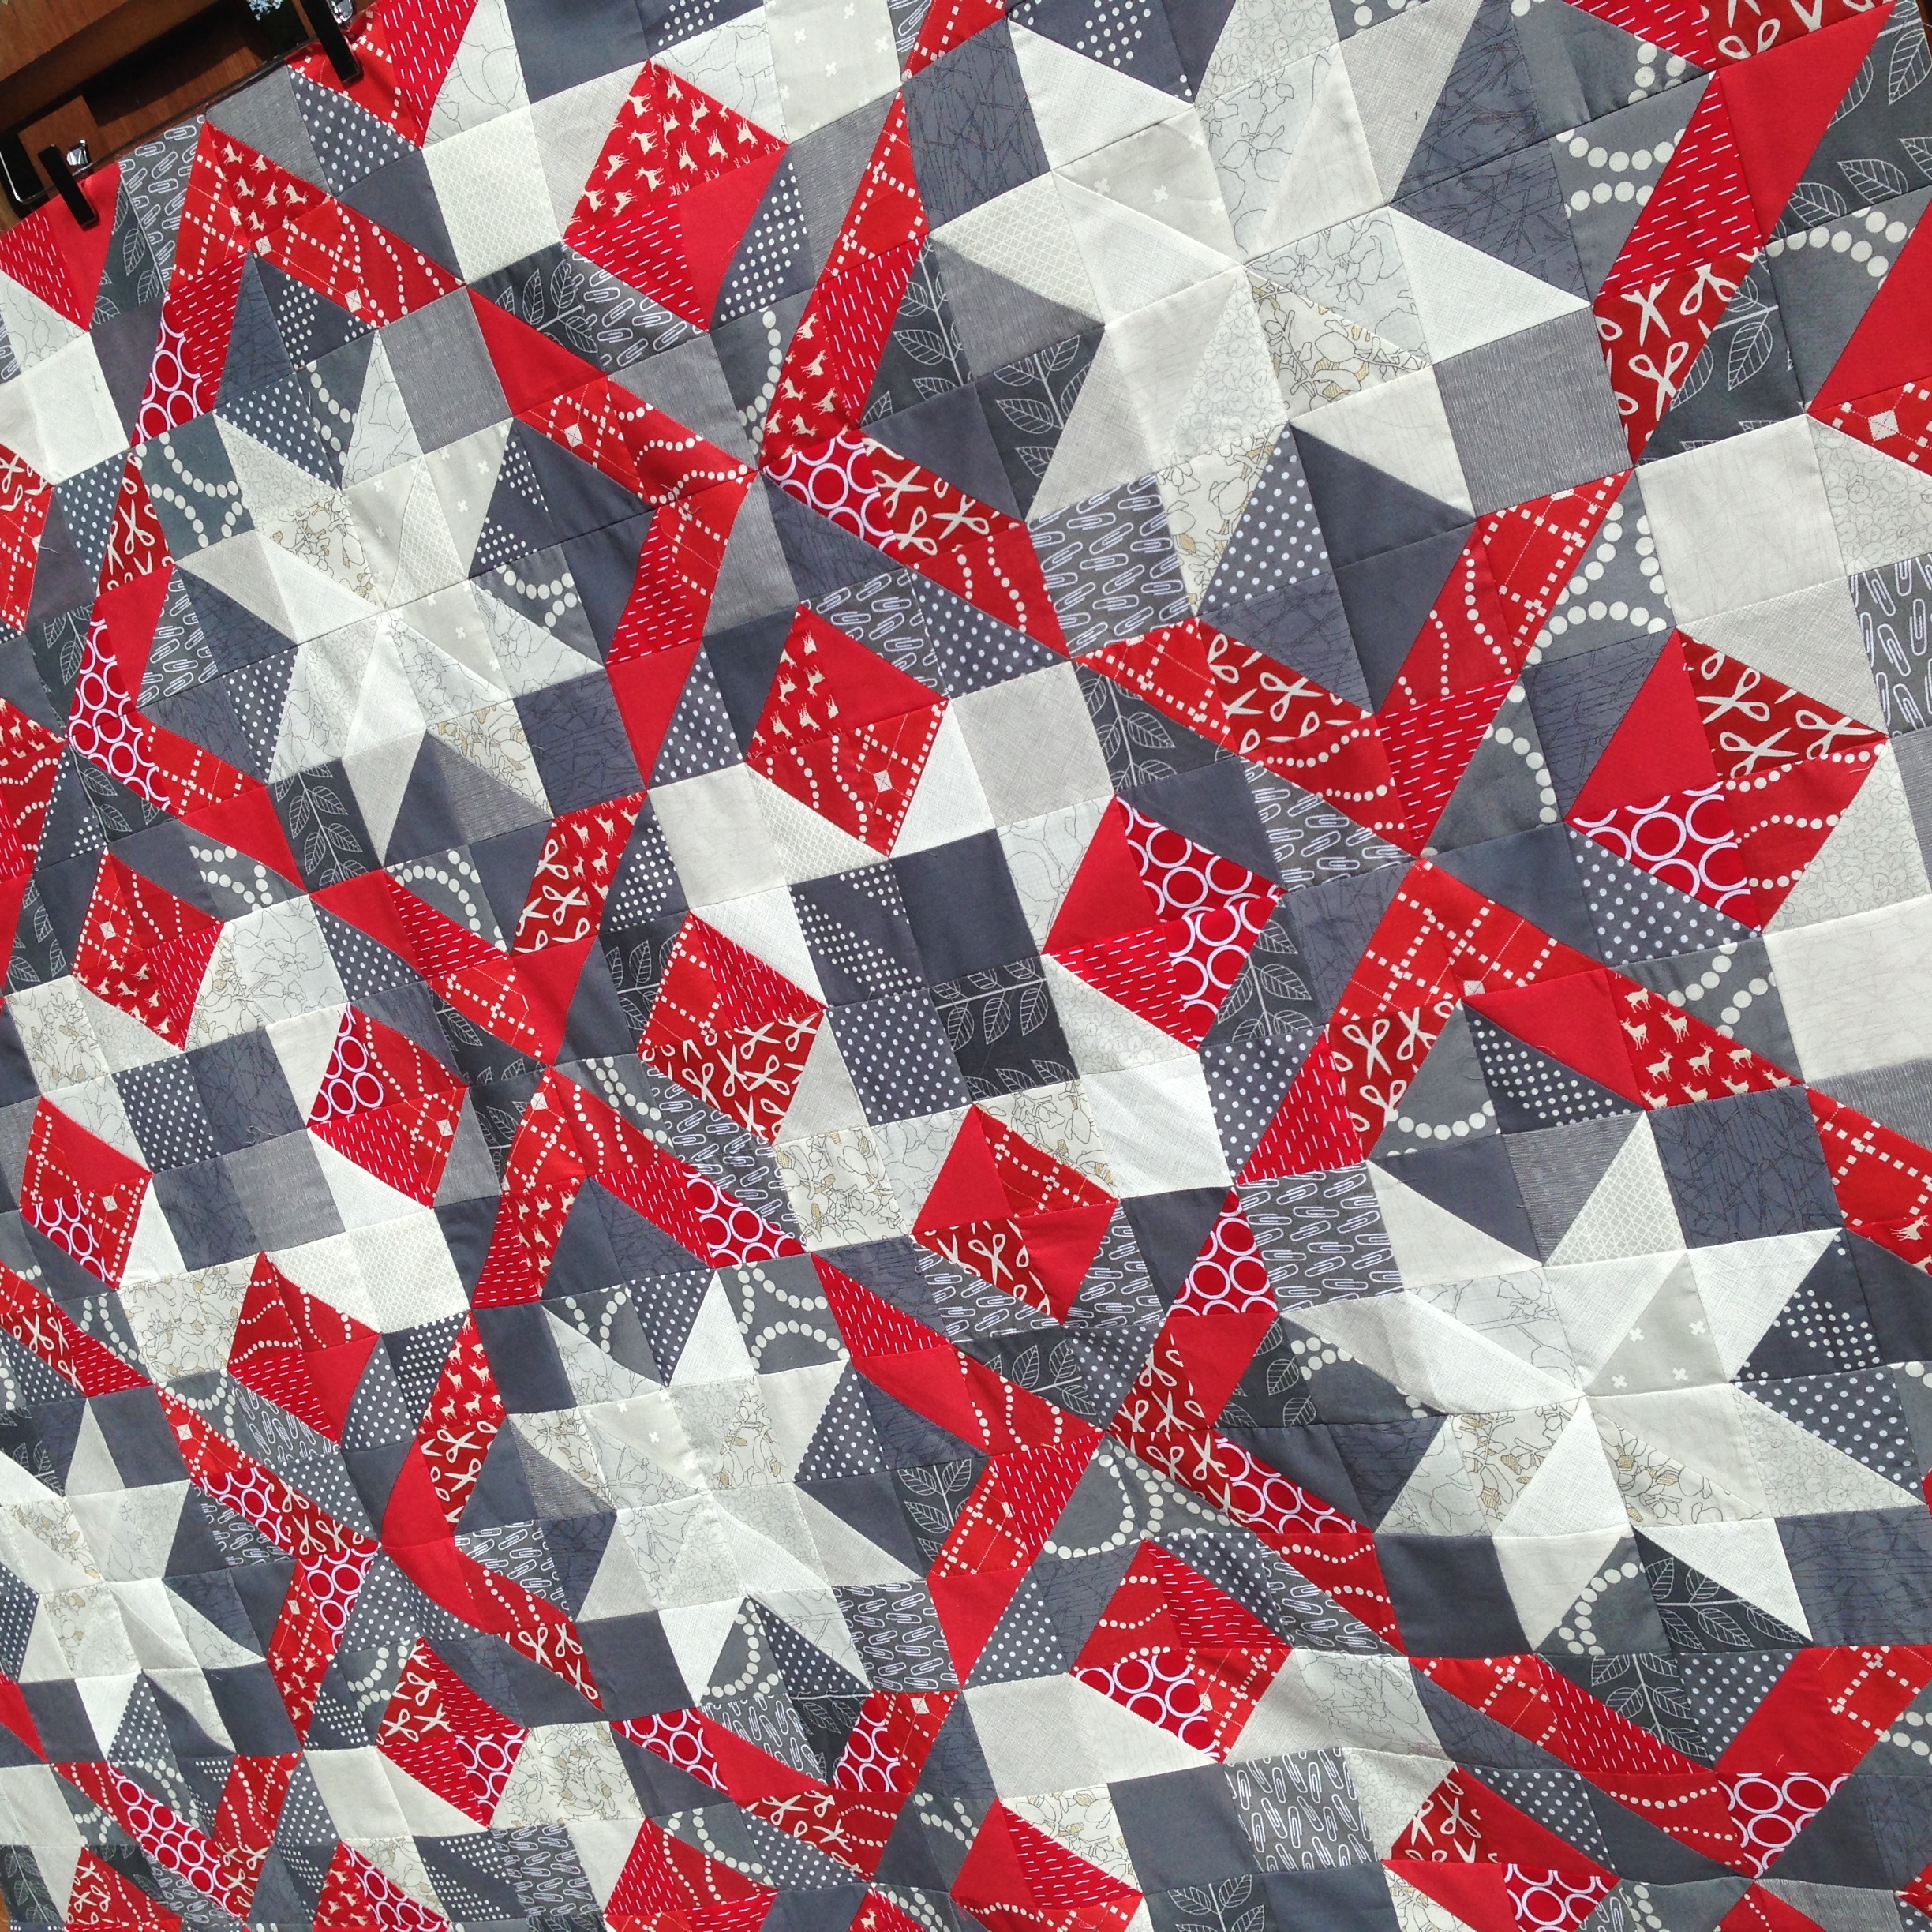
It’s my most traditional and intricate quilt to date. At 72″ square, there are more than 500 3″ finished squares of all different scrappy red, cool gray, and white-on-white prints.
It fits my goal of making something festive but sophisticated, and it will be so warm to snuggle under next to the tree. I know it’s only September, but hopefully this is plenty of time for quilting and binding.
I’ve been asked about the pattern. I used this quilt from Flickr as inspiration to design a similar block to use in repeat, so I’m going to share the pattern I made to send to the NJMQG bee mates who contributed blocks.
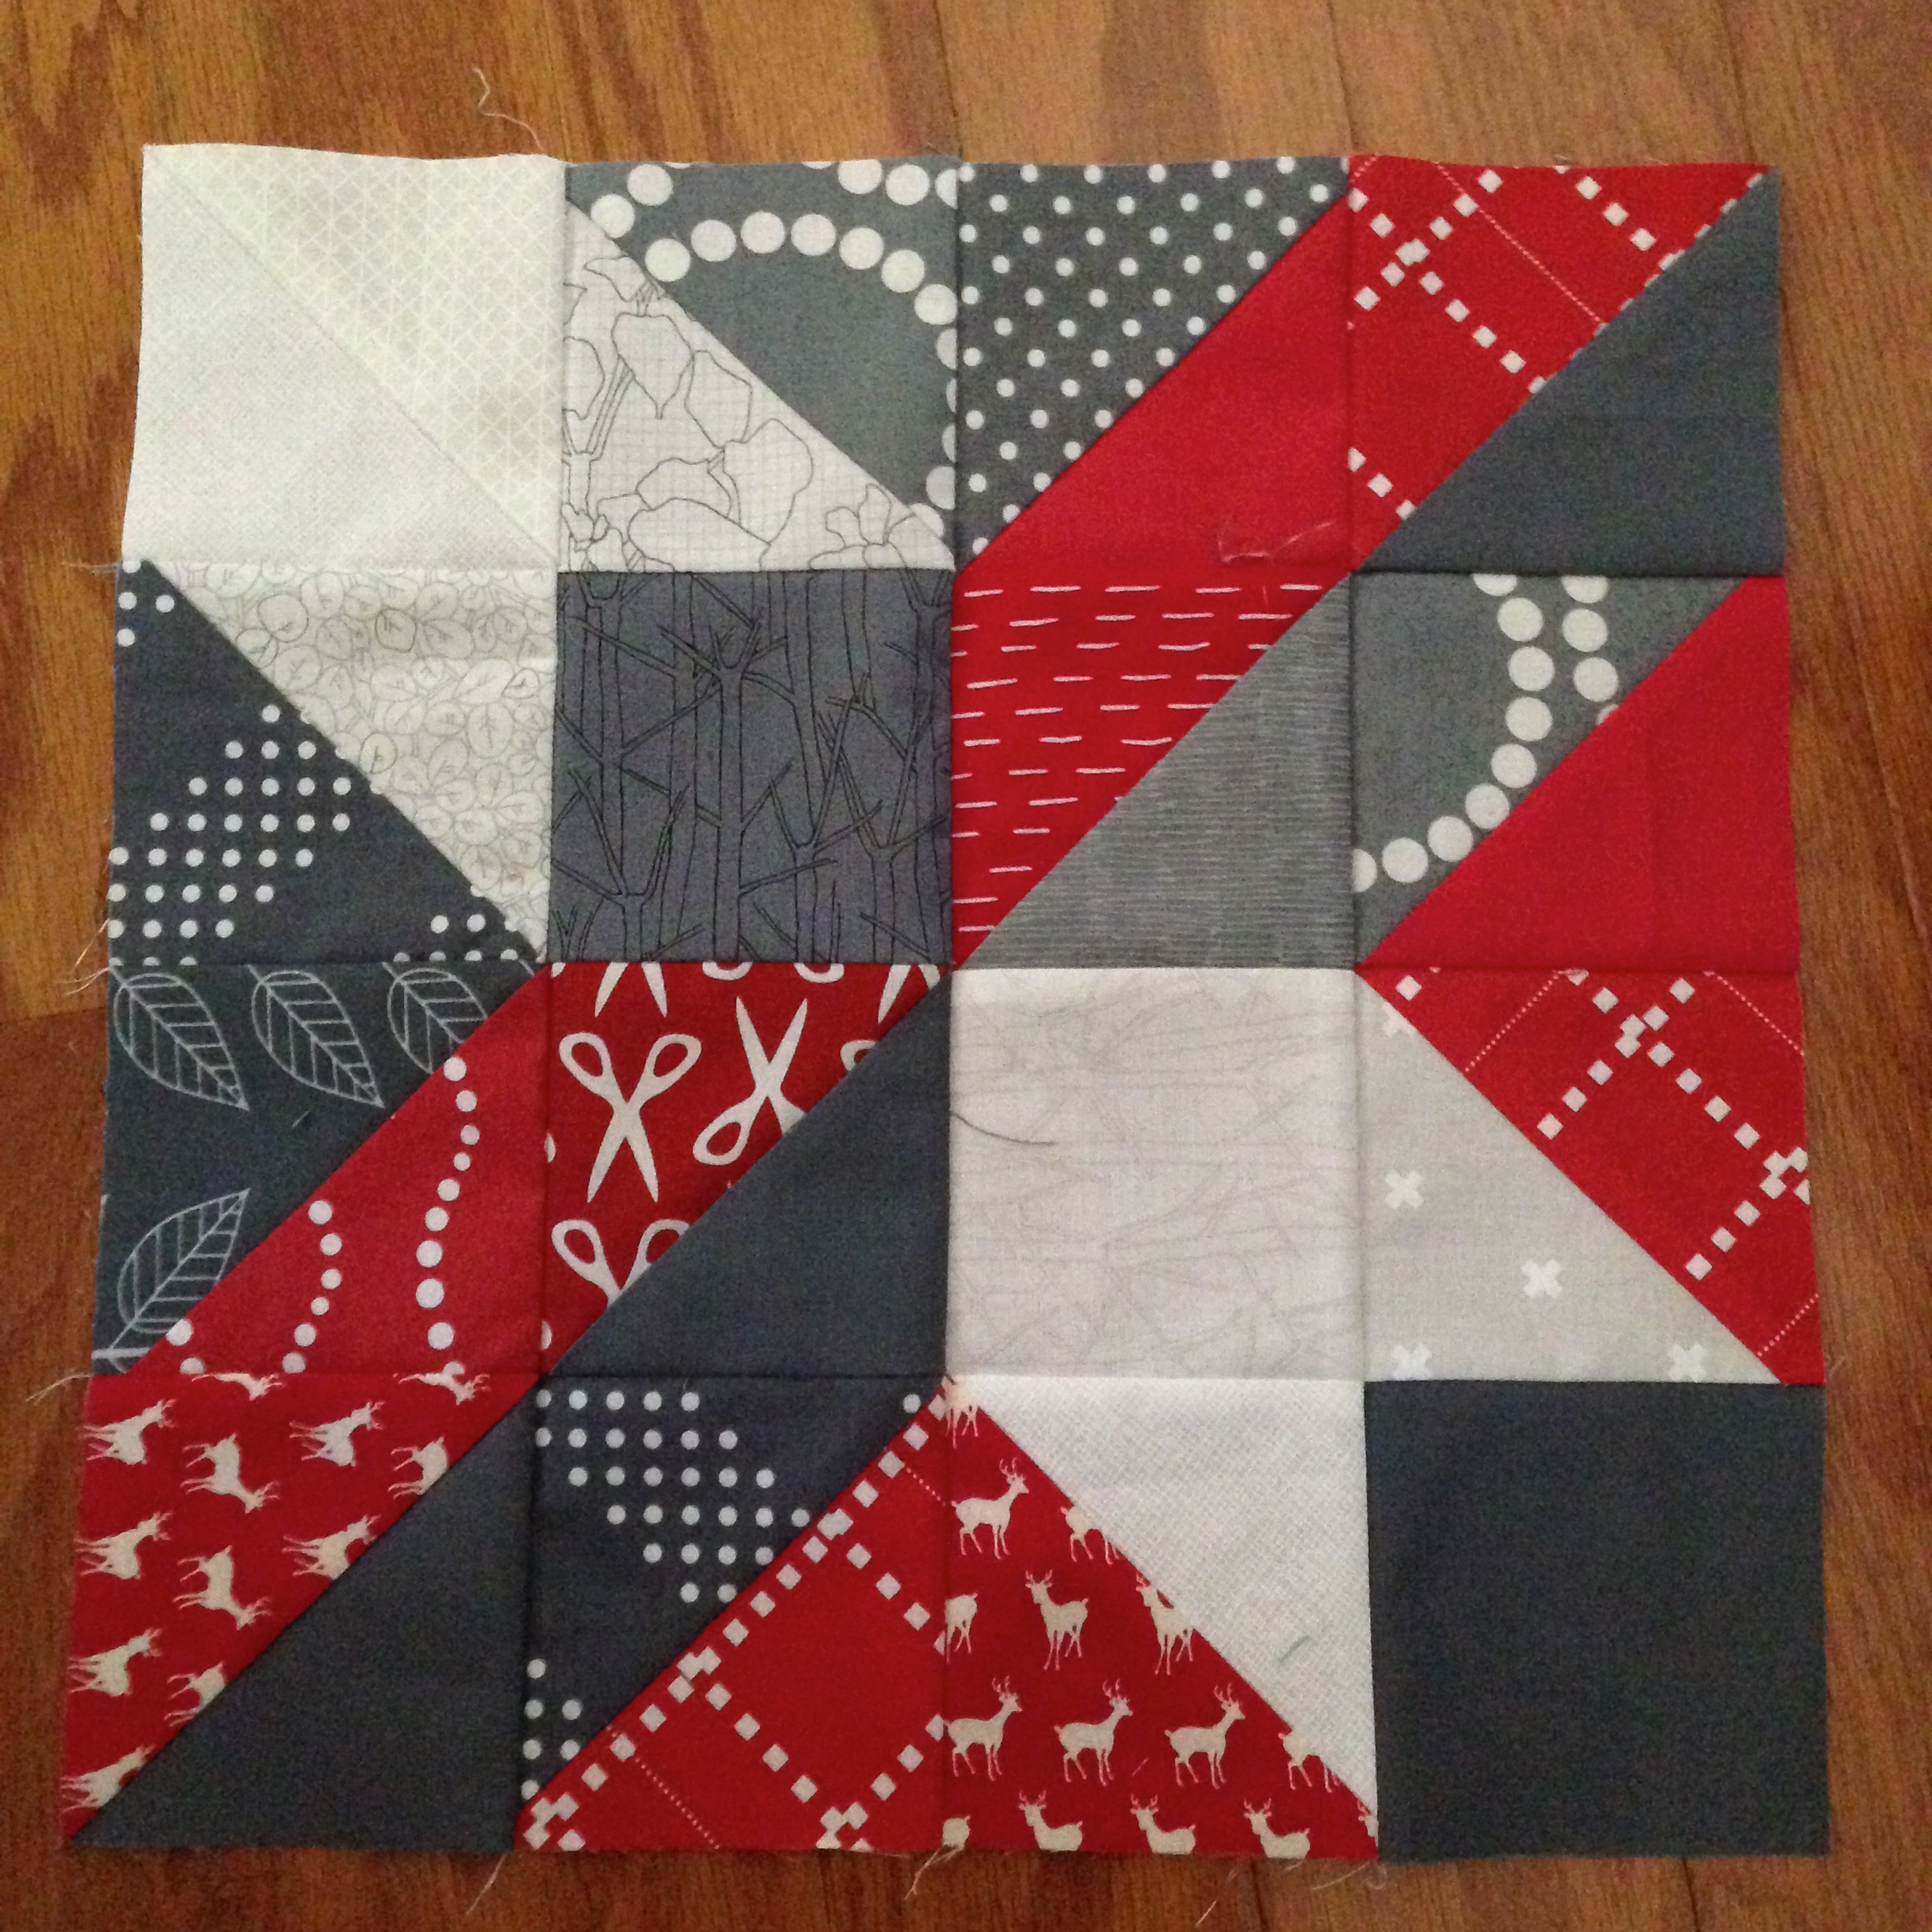
Each finished block is 12 1/2″ unfinished and represents one quarter of a snowflake star. I outlined one block in black on my design to demonstrate:

CUTTING DIRECTIONS
4 1/2″ squares: 4 white, 10 red, 10 gray
3.1/2″ squares: 2 white, 4 gray
MAKE HST UNITS
Make 1 set white/white, 2 sets gray/white, 8 sets red/gray, 2 sets red/white
There are lots of great HST tutorials out there. I like to put two squares right sides together and draw a line diagonally from one corner to another. I sew 1/4″ on either side of the line and cut on the line. Press open.
Trim HSTs down to 3 1/2″ square.
ASSEMBLE BLOCK
Lay out and assemble blocks with 1/4″ seam allowance according to the photo below.
Voila! My quilt uses 36 of these blocks to make 9 full snowflake stars. I’d love to see other versions of the blocks, so if you make some, let me know!
Ok, one more big shot:

Linking up with Lee at Freshly Pieced for WIP Wednesday!
Are you thinking of writing this as a pattern up? great design, thanks for sharing and how very organised with a christmas quilt.
Oh, so many fun things!! I, for one, am so thankful for all your writing and scheming and quilting and all the goodness it brings out into the world. This post constitutes the second time this week (already!) that you got me teary-eyed. I’m so lucky to have nabbed you as a friend, inspirational buddy and sparkling creative light.
This is perfect! I love the modern palette with the traditional block 🙂
Yay!! It’s done ! And it looks fantastic. Beautiful job Melanie!
This is gorgeous! I find myself drawn to “classy” traditional quilts and this is just that. Great job!
Beautiful quilt! Love the colors that you chose for this! Well done!
The palette here is lovely, and the idea of tackling the same design in different colors is a tempting one. : )
Bee-autiful!!!! You are such a talent and have a really unique eye. Love this for snuggly Christmas memories.
Love the red, white and greys together! That pattern is so great with those colors, and I love that it doesn’t scream xmas.
I LOVE this quilt. As you say, it’s a departure for you, but you’ve made a fairly traditional design all your own, and the use of the dark greys is inspired.
Oh Melanie, it’s stunning! What an elegant and fantastic Christmas quilt. Love, love, love it!
Oh, my!… But that is One Stunning Quilt!! Melanie, you are ever such an inspiration!! (I now have SO many quilts on my “must-do” list, that are inspired by your awesome work!!)….
*Thank you* for sharing!!
Pat T.
in Michigan
(and, Woody’s looking pretty handsome, there!)
It came out lovely! Beautiful Christmas quilt !
it’s gorgeous! thanks for sharing your pattern.
Pingback: Christmas quilt quilted, and an offer from Late Night Quilter | melintheattic
Pingback: The Christmas quilt | melintheattic
I really like this but would pick different colors and yes I would try different ways with the the patterns, but looks great,,,Jeanne Wallace
this is a very easy quilt to put together .love it . thank you . mine is orange and and green .
Where are the directions? What’s here is not enough information for me. I am still new at this and need directions.