Blip – A baby quilt tutorial
I have a lot of respect for huge, detailed quilts. And I’ve enjoyed the satisfaction of completing one myself. But sometimes you need to make a quick baby quilt. Or you just want the satisfaction of finishing something. I feel that way often. I felt that way this week.

So I whipped up a green and peach version of a quilt that I first made for my son last summer. It’s the perfect size for a baby or toddler— Miles is 3 1/2 now and still uses his when he naps at school. It is simple enough to make quickly, but with the right fabric it packs a lot of punch.
I chose the name Blip because it’s like a little disturbance in a strip quilt, a slight tremor in the status quo. It’s fat quarter friendly— if you like the way a stack of fat quarters look, you will like how they look in this pattern. I started with this:
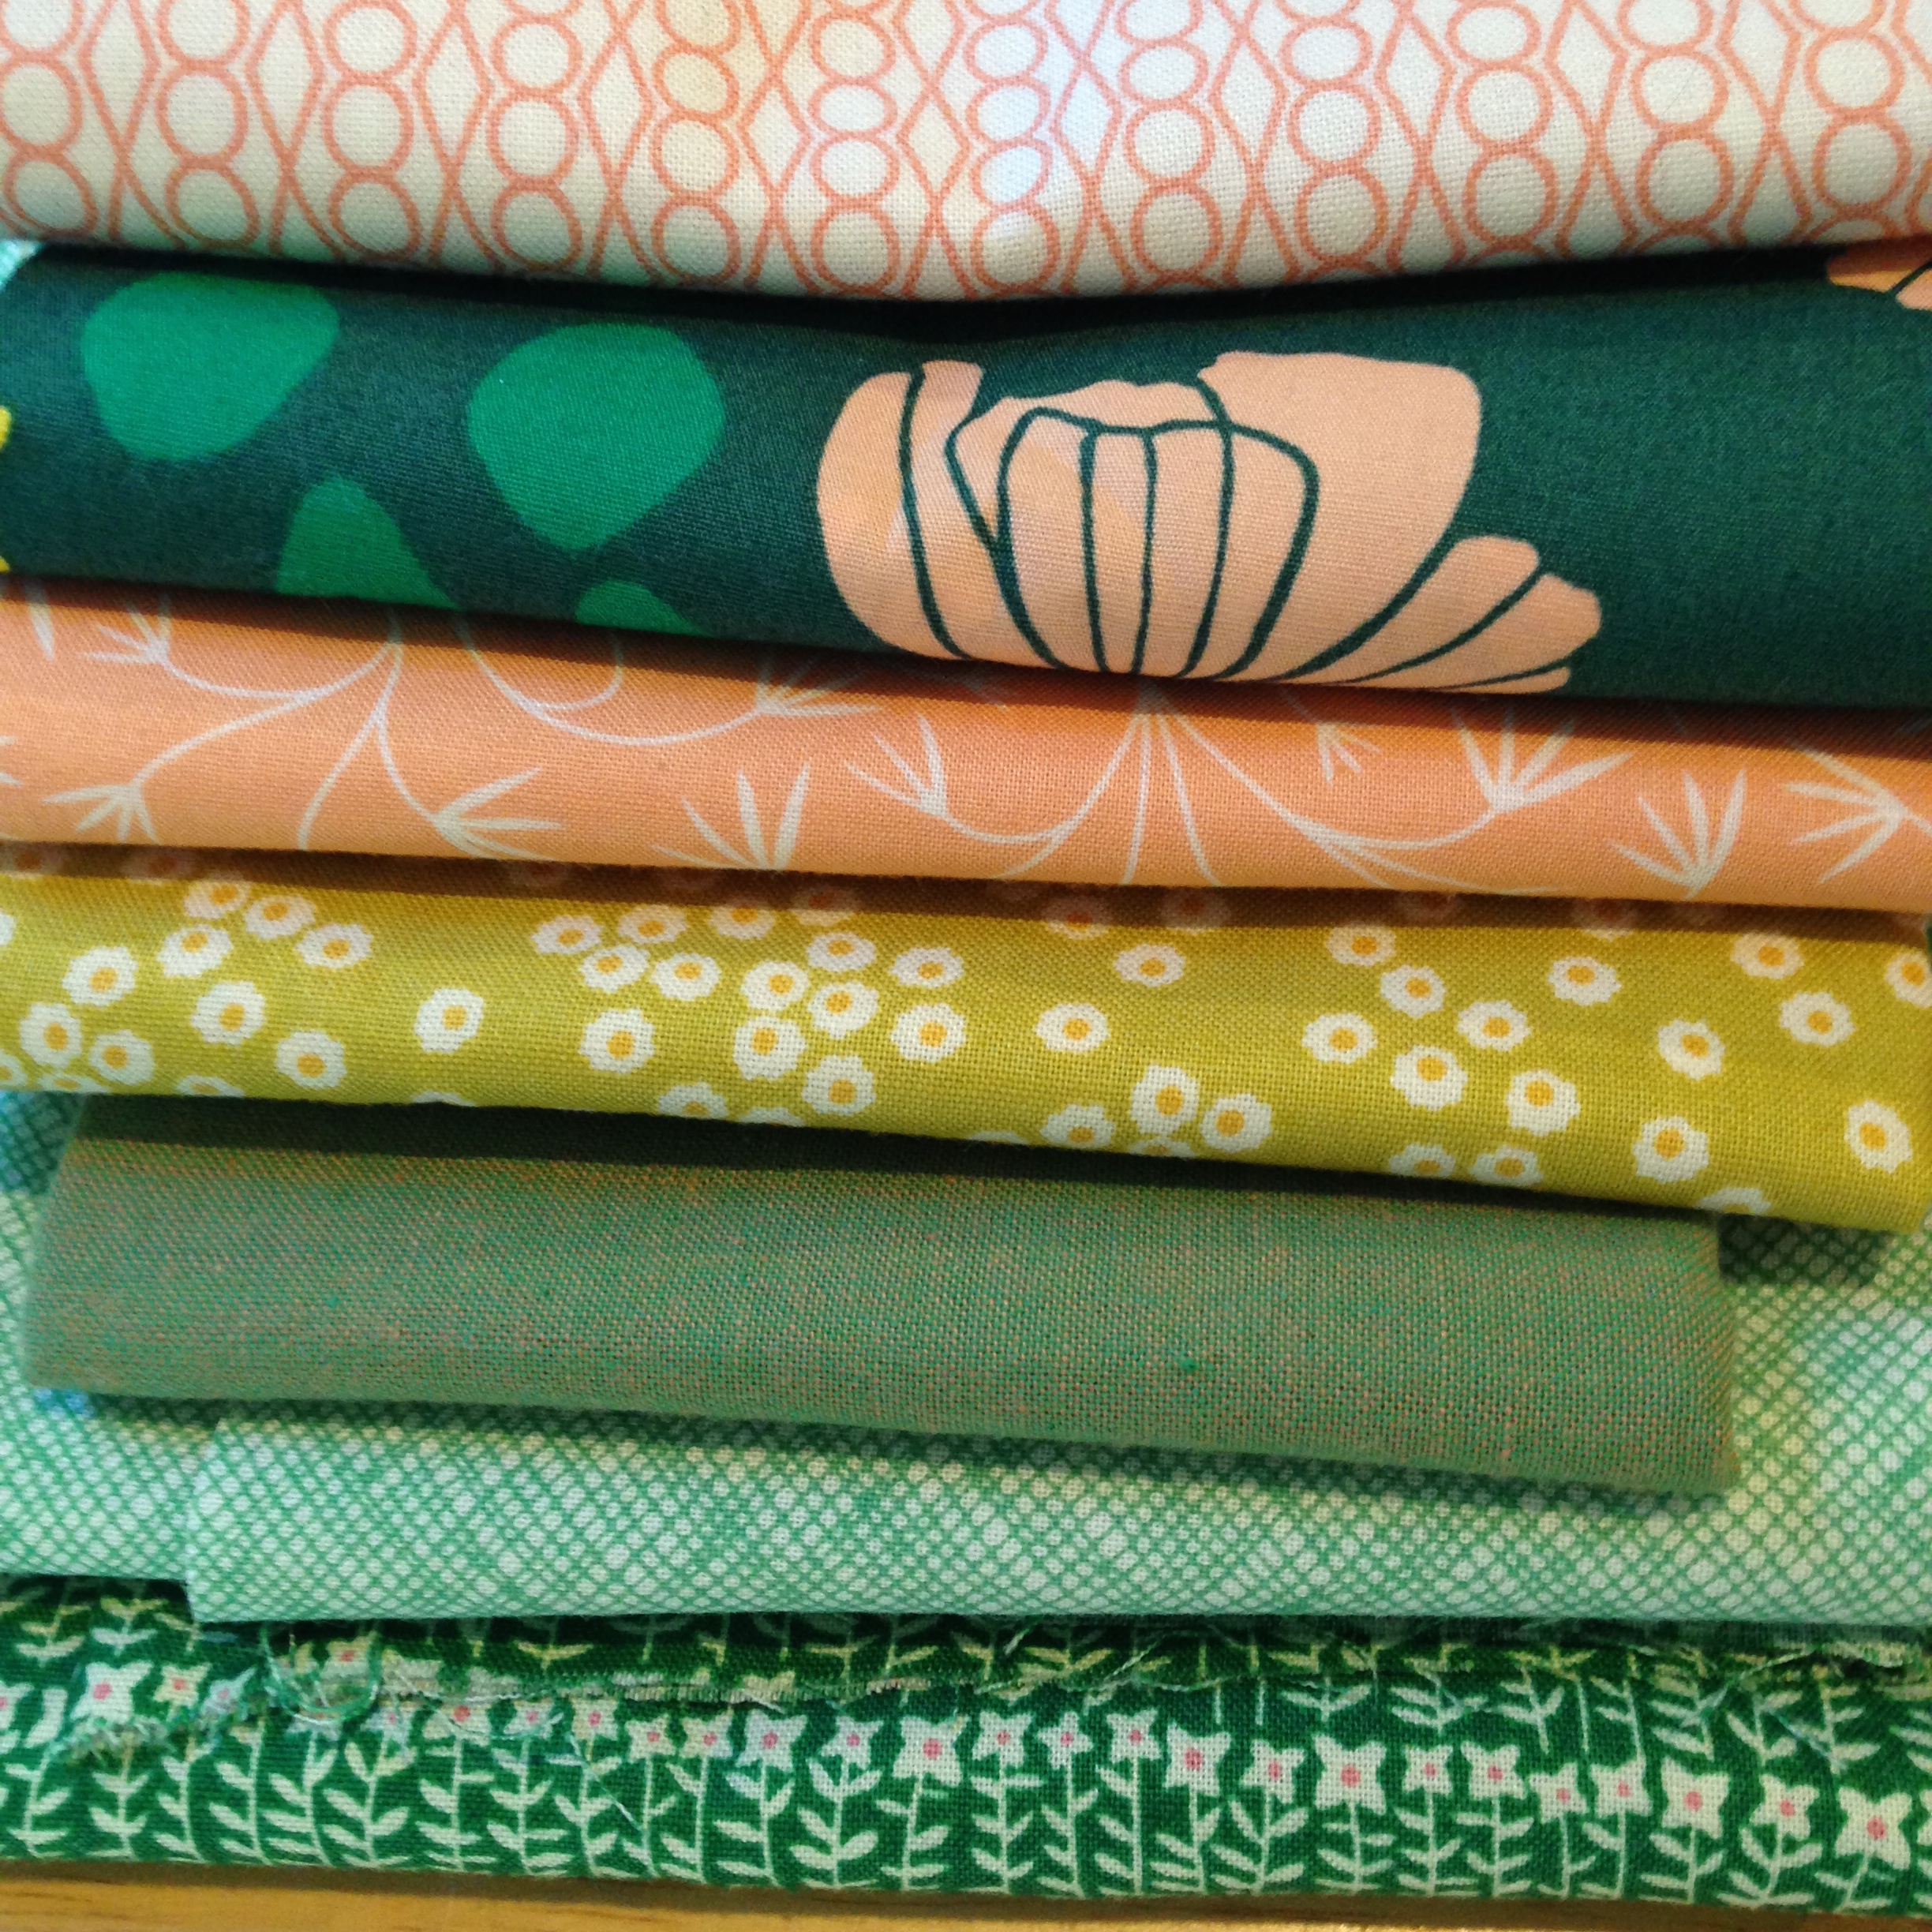
and fell in love with it. I wanted to change the order a bit, but mostly enjoy how these fabrics look together.
I often like to pick a multi-colored print and pull in the colors with blenders or single-colored prints. I did that with the green and peach Meadow print, using both green and peach in high and low volume with a pop of yellow. To be honest, the greenish yellow that I used isn’t quite the same as the more golden one in Meadow, but I think it works!
One more word about fabric selection before I get to the tutorial. The pattern uses half square triangles (HSTs), so large or directional prints will get chopped up in the middle of the blip (see the multicolored fabric). Stripes will tend to look a little off. If that’s ok with you– I happened to like how the large print came out–then go for it! But stick with prints that will read with unity when cut and reassembled.
Ok, here’s my tutorial:
Blip
Size: 38” x 42”
Fabric requirements: 7 FQs or quarter yards
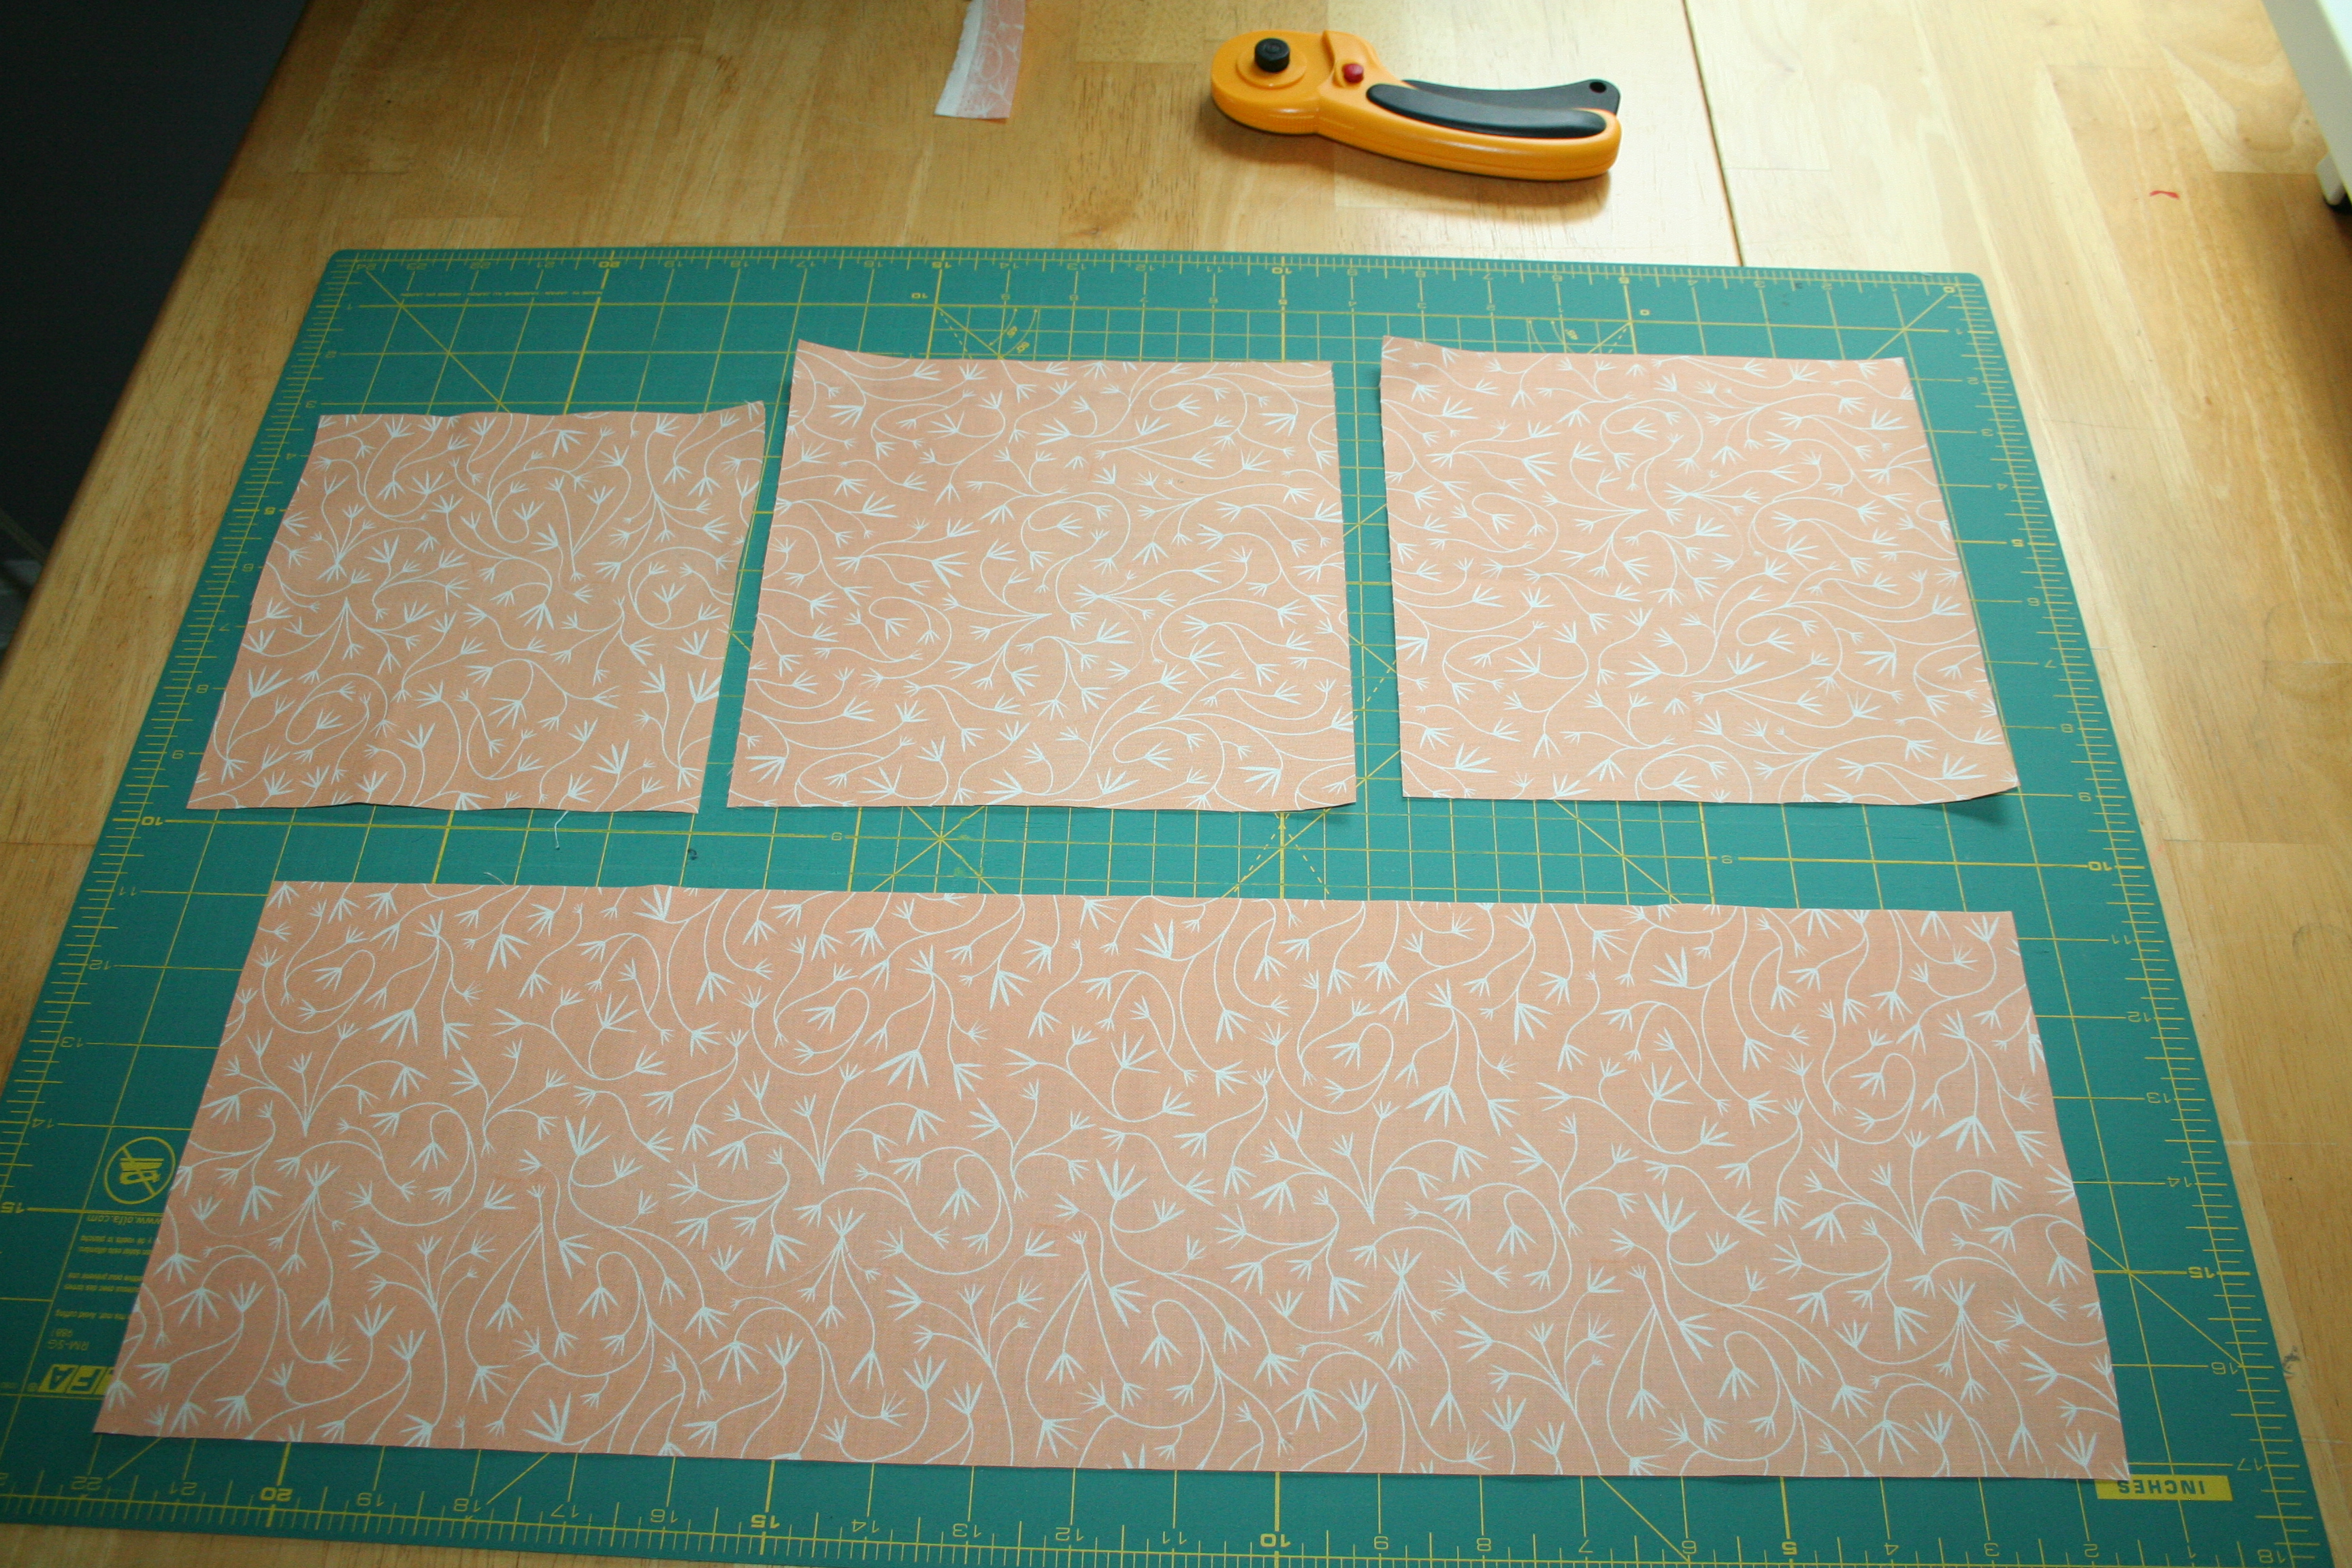
Cutting instructions:
From each fabric, cut the following:
2 – 7.5” square
1 – 6.5” square
1 – 6.5” x 20.5 (these can be as short as 18.5” if your FQs are on the smaller side, but I prefer them a little bigger. Just be sure that all seven are the same length.
Arrange your fabrics in rows as you desire like so: small square, two bigger squares, long piece. Label the rows A – G.

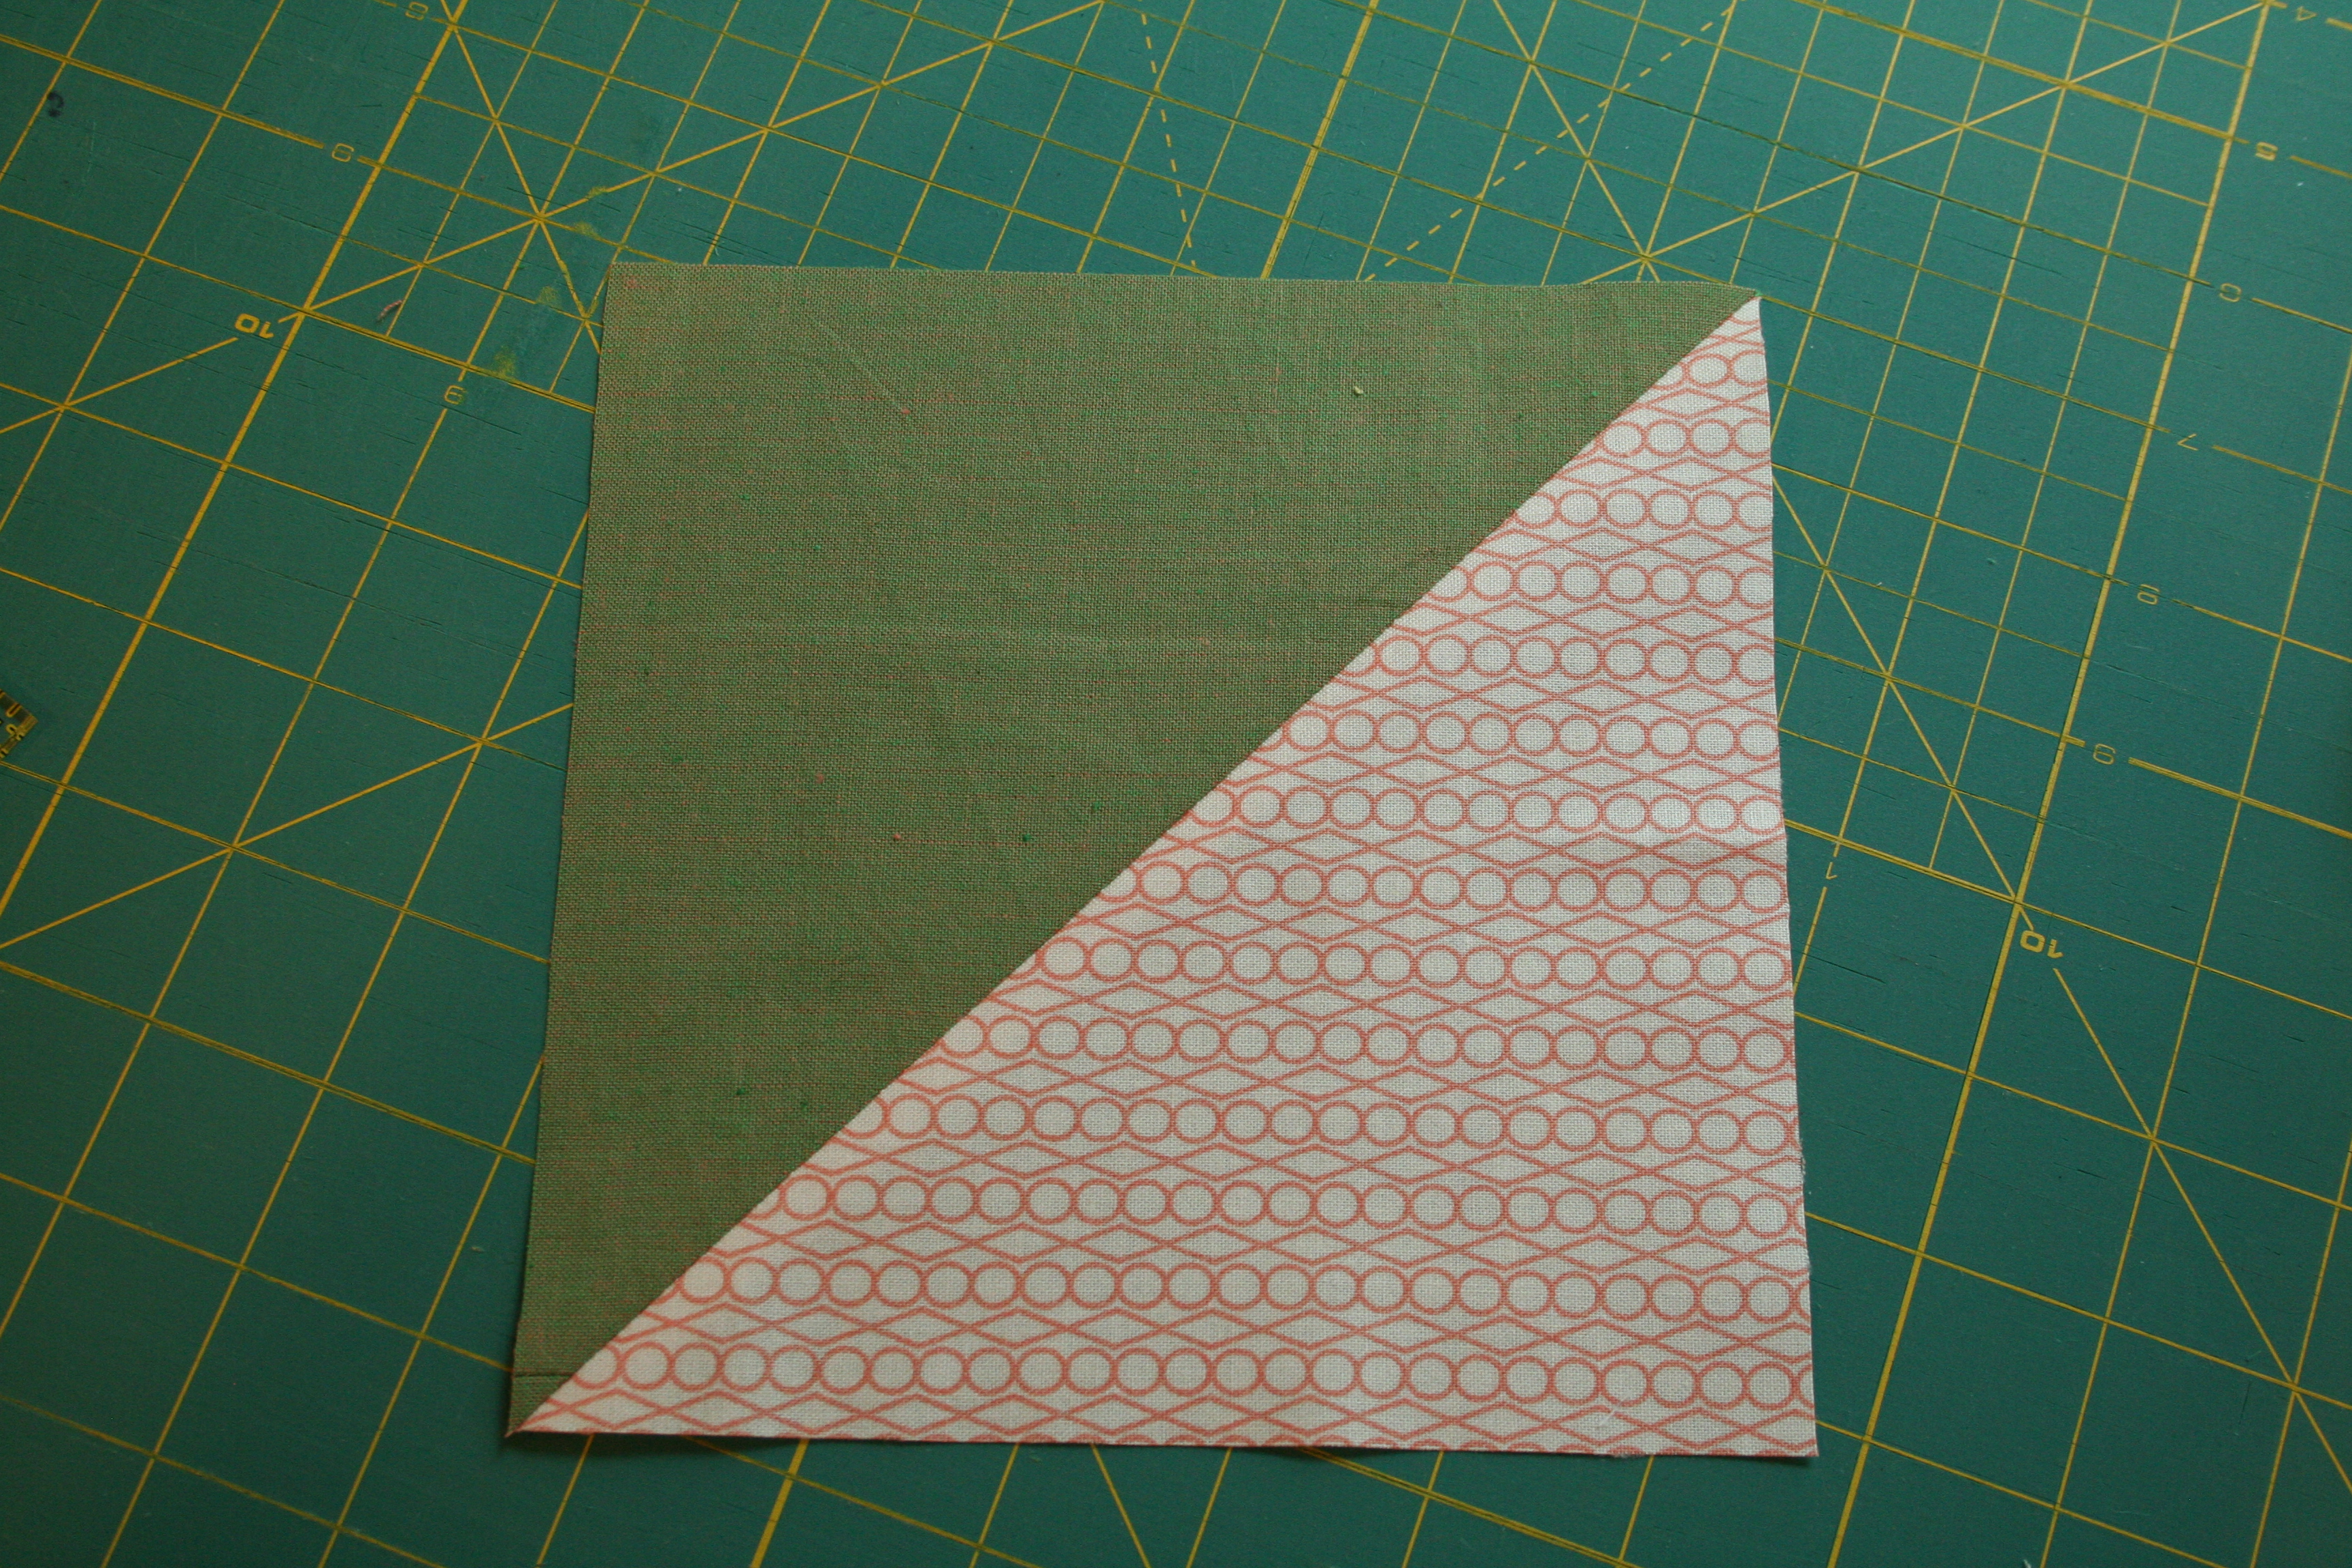
Next, pair up your 7.5” squares to ready them for HSTs. Make one set of A/B, one B/C, C/D, D/E, E/F, F/G, and G/A.
Place the two 7.5” squares in each set right sides together. Draw a diagonal line between corners with your preferred marking tool on the top piece. Secure with pins (I rarely use more than two— just enough to prevent shifting.)

Sew a line 1/4” from each side of the marked line. I like to use my quarter-inch foot. I also like to chain piece all the seams on one side, then turn them around to do the other side.

Remove the pins and cut along the marked line. You’ll now have two HST units from each set. Press seams open.

Trim to 6.5”, making sure that points are precise. This will make the points sharper on the quilt top too.
Lay rows out, rotating HSTs to form the blip in each row.

Assemble top using a consistent 1/4” seam allowance.
——————
Traditionally, I would then piece each row and then sew the rows together, but I realized that piecing vertically, so to say, would involve far less pinning and seam nesting. Here’s how I did it.
To avoid having to match seams in every horizontal row, I assembled the quilt in vertical rows. First all the 6.5” squares, then the long rectangles. I pressed all the seams to the “side” in a “downward” motion, meaning that seams are pressed toward the bottom of the quilt.
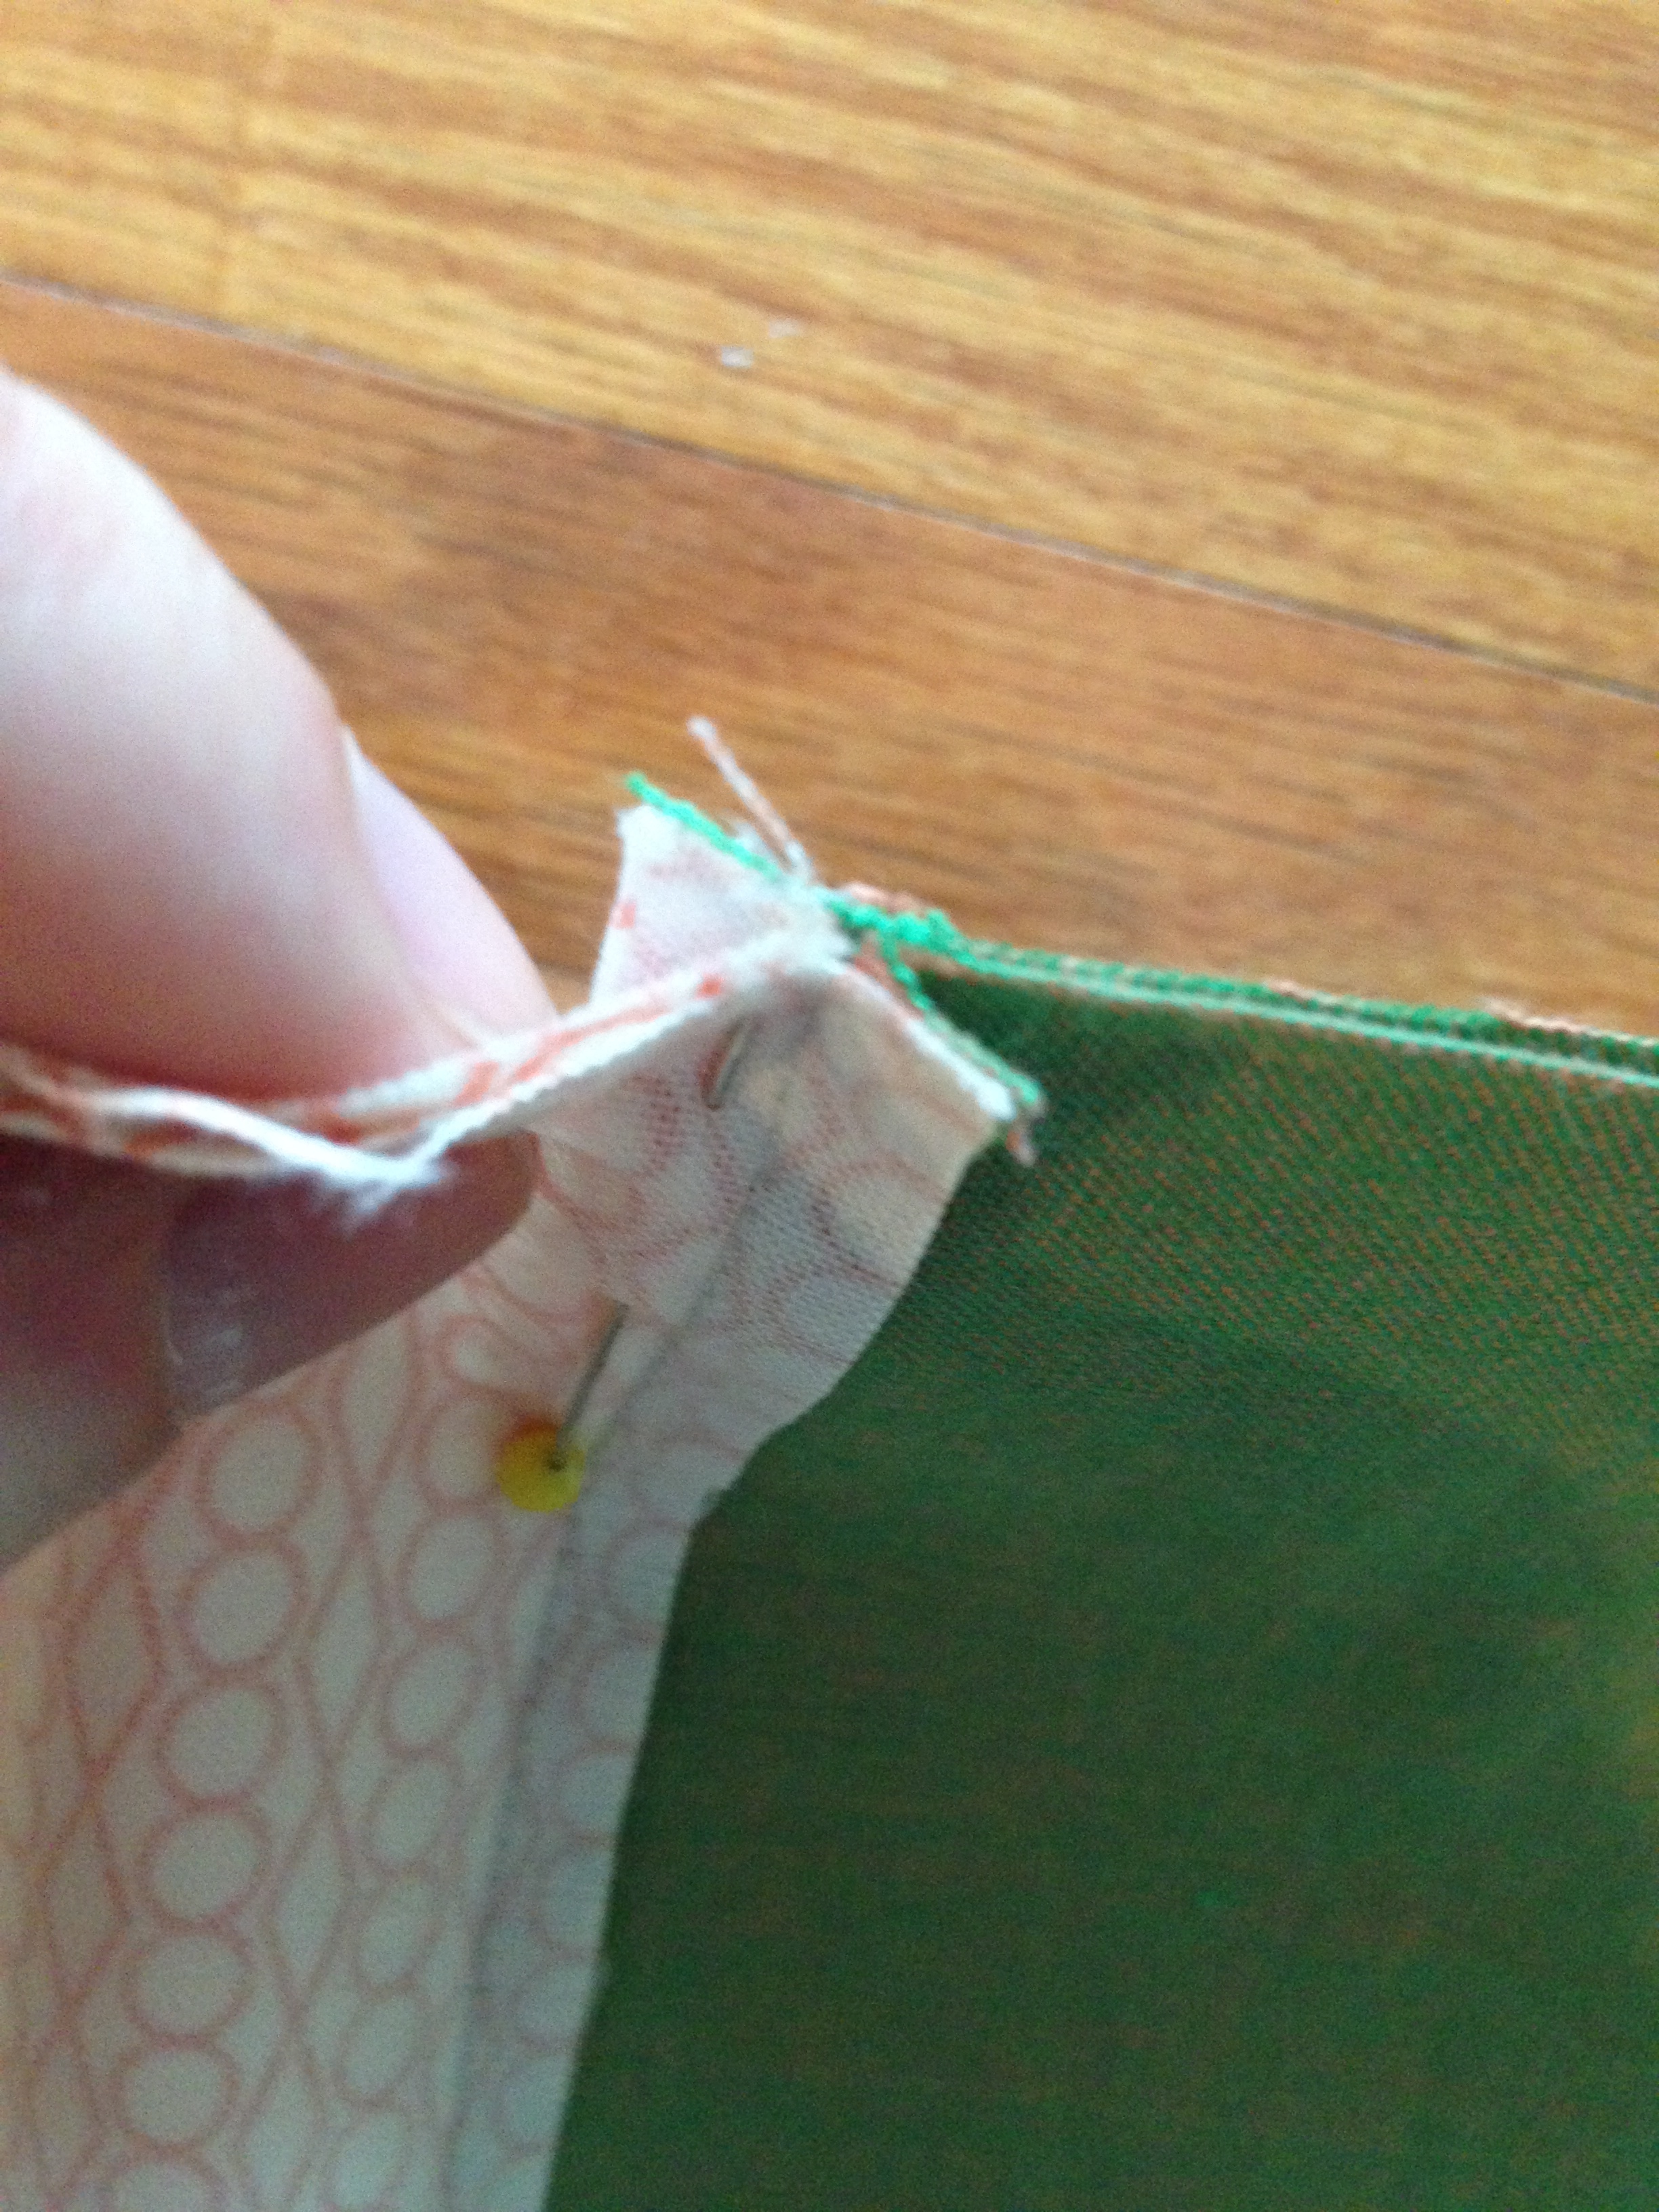
Next, I put each pair of HSTs together. I alternated pressing right and left on each side so that I could nest the seams to match points.
Here is a picture of nested seams. You can see how the seam allowances are pressed in different directions, then butted up against one another for pinning. I just love the feeling when they lock together just so.
Once all the HST pairs were assembled, I pieced them all together in a vertical row. At this point I had three large pieces— the row of 6.5” squares, the HST column and the rectangles. Next, I nested the seams and pinned, then sewed them together. There were only three rows with multiple seams to match!

Voila! an easy but striking baby quilt top that shows off beautiful fabric. You can use a single 1 3/8 yard cut for the backing along with 1 3/8 yard of batting.
If you make a Blip quilt, let me know! I’d love to see it. I need to make a boy version now, or a black and white one, or one in solids with a scrappy stripe…
Love the fabrics you chose! They are so sweet, and your pattern shows them off so nicely.
Very nicely done. I love the focus fabric in the center to give it a pop!
I love the idea of breaking up the strippy quilt. Have made a number of these and had decided to break up the strips in the next one with nine patches or rails. But first, I am going to try one of your design. I think I will do it in plain colors. Love your work……..
Totally dig your tutorial and am going to pin this to my inspiration board. I am sure there will come a time when I want a quick and fun quilt, and I look forward to making this! 🙂
what a great pattern! thanks for sharing!
Thanks Yvonne!
Thank you so much, Erin! I’ve been loving everything you make lately.
Thank you so much!
Thank you! It was a case of a big fabric really working and tying all the small prints together. I love when that happens.
Thanks, Renee! This is a “show the pretties” pattern. No need for little pieces here. 🙂
I love stripe quilts, and your blip is such a great little twist.
I LOVE all the fabrics!!