Technicolor quilt tutorial
Here it is, my first tutorial! I made the Technicolor quilt top and back with a mini jelly roll from the Simply Color collection by Simply V and two yards of Kona Bone. Because it was a sample for Rock Paper Scissors I wanted it to be something simple, modern and striking that would show off all the amazing things that a quilter can do with ombre fabric. It’s also easy enough for beginners.
But first, I have to tell a little story behind the design and give credit for my inspiration.
As soon as I saw the ombre fabrics from the new Simply Color collection at the store, I knew I had to make something with them. The mini jelly roll was the perfect way to play with the collection. The challenge for me was how to arrange the strips, which come in pink, blue, turquoise, green, orange, purple and gray. Each shade is deeply saturated near the selvedges and fades in the middle. I Googled the collection to see what other people had made so far. I found this trio of quilts from Amy at Diary of a Quilter that she made for the Simply Color booth at Quilt Market in the fall. They were so simple, so lovely, and made such a clever use of the fabric that I wanted to do something like that in a design of my own. (And make a couple myself.)
With that inspiration I started to play with the strips. That is how this baby-sized quilt was born. I call it Technicolor, inspired by the palette (and because I had the Wizard of Oz on TV in the background while I did the piecing).
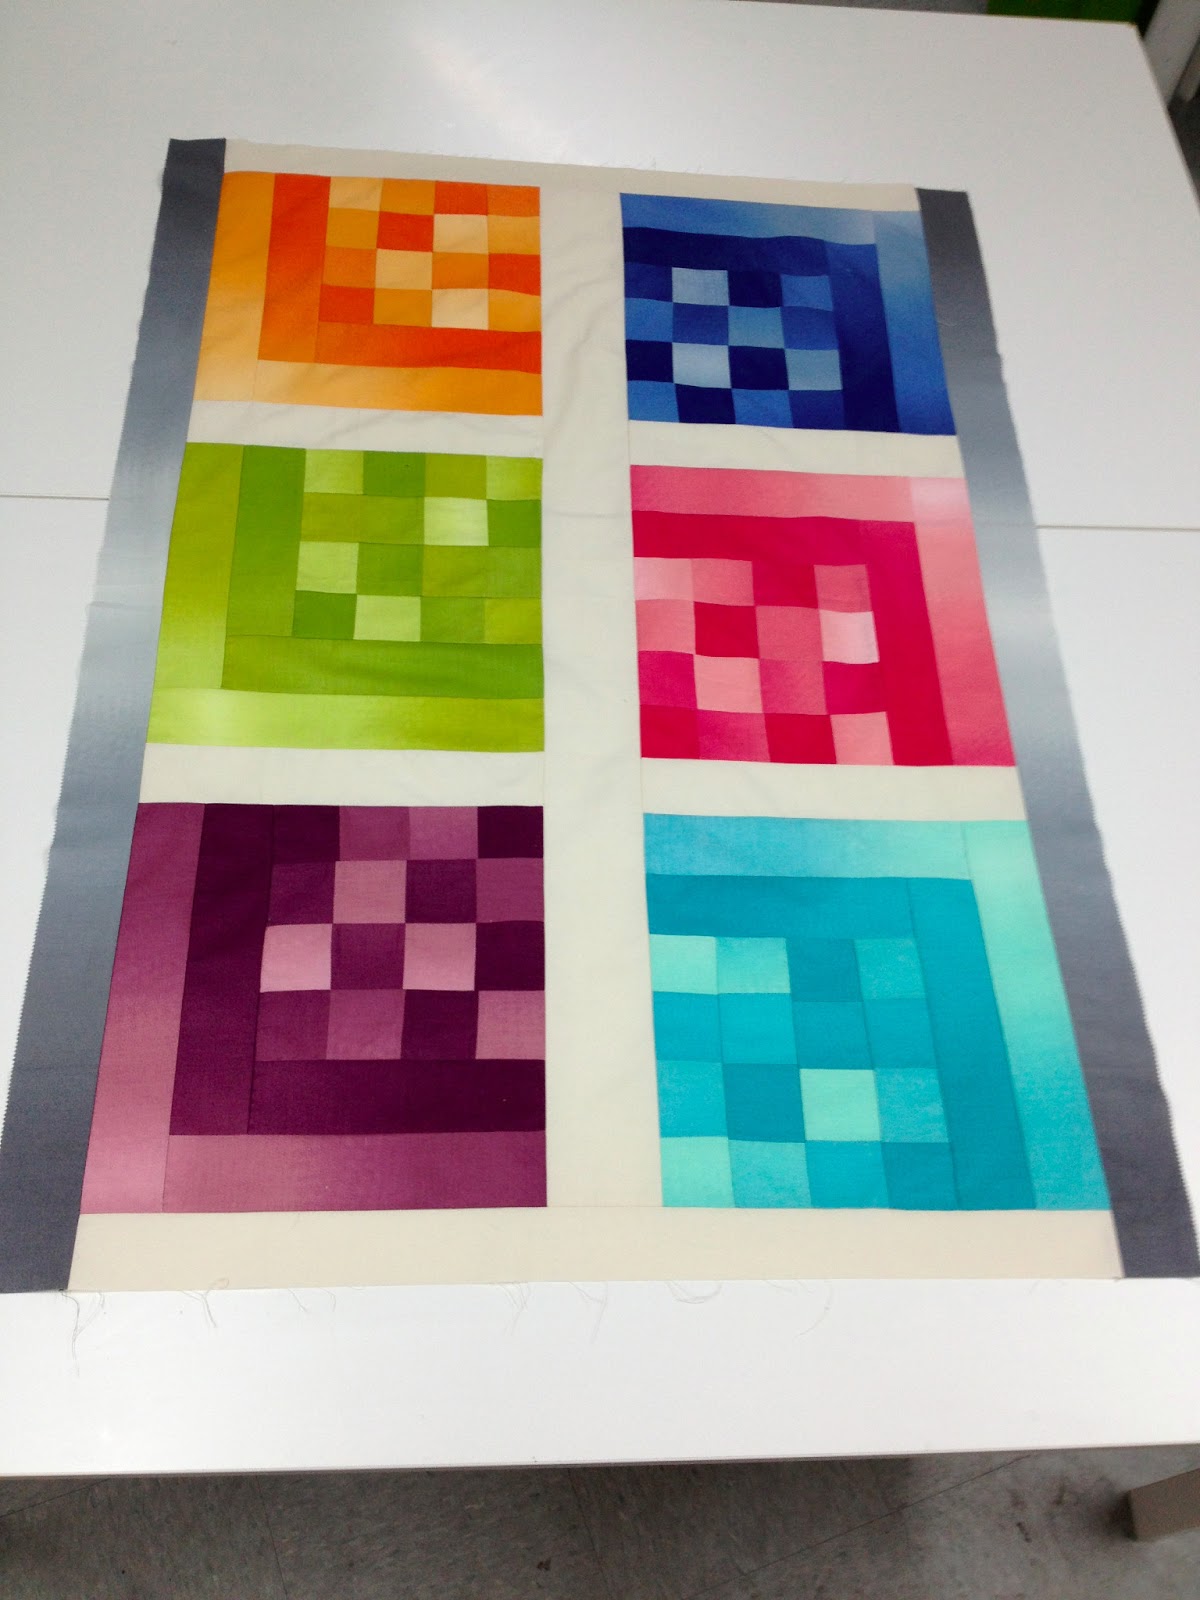
The pixels and gray sashing remind me of vintage TV. The shading gives it a lot of movement.
Here is my tutorial for a baby-sized (26 inches by 40 inches– though you can make it wider with a little extra solid fabric) quilt using one mini jelly roll of Simply Color and 2 yards of your favorite solid neutral (mine is Kona Bone). The mini roll contains 22 2.5×45 strips of the ombre fabrics in seven colors.
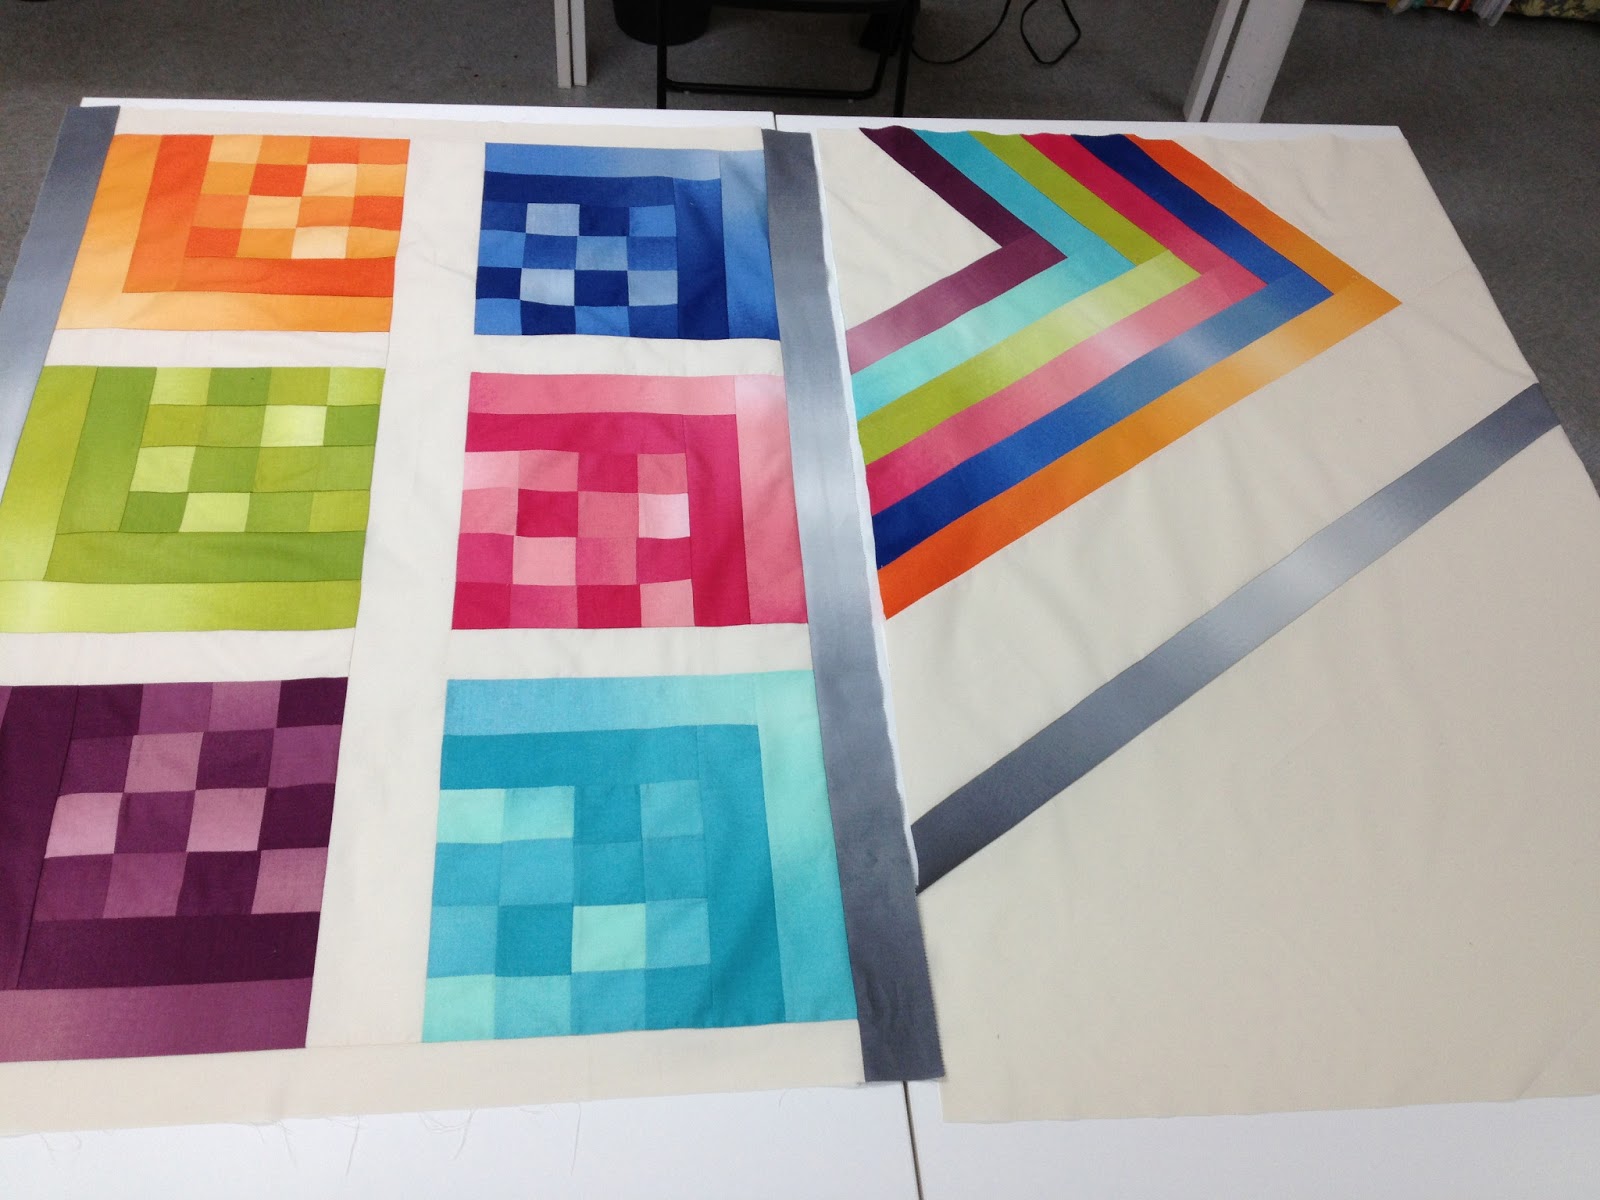
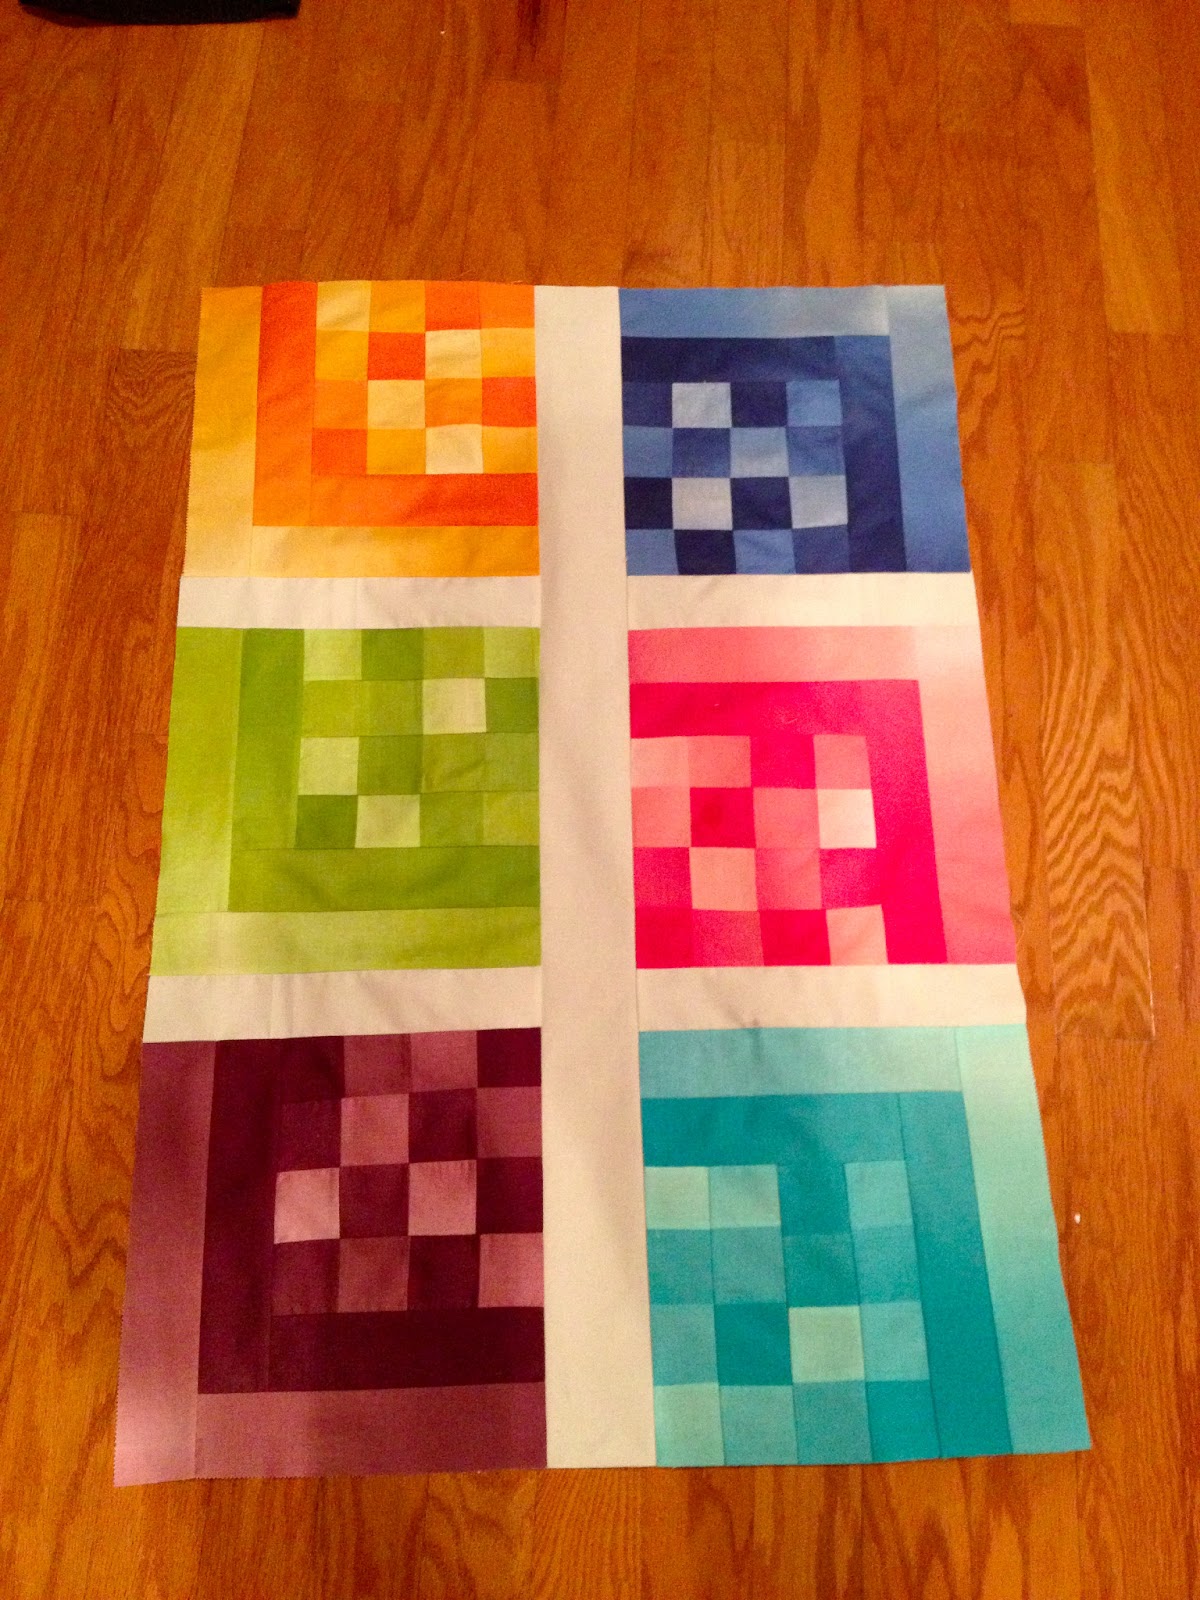
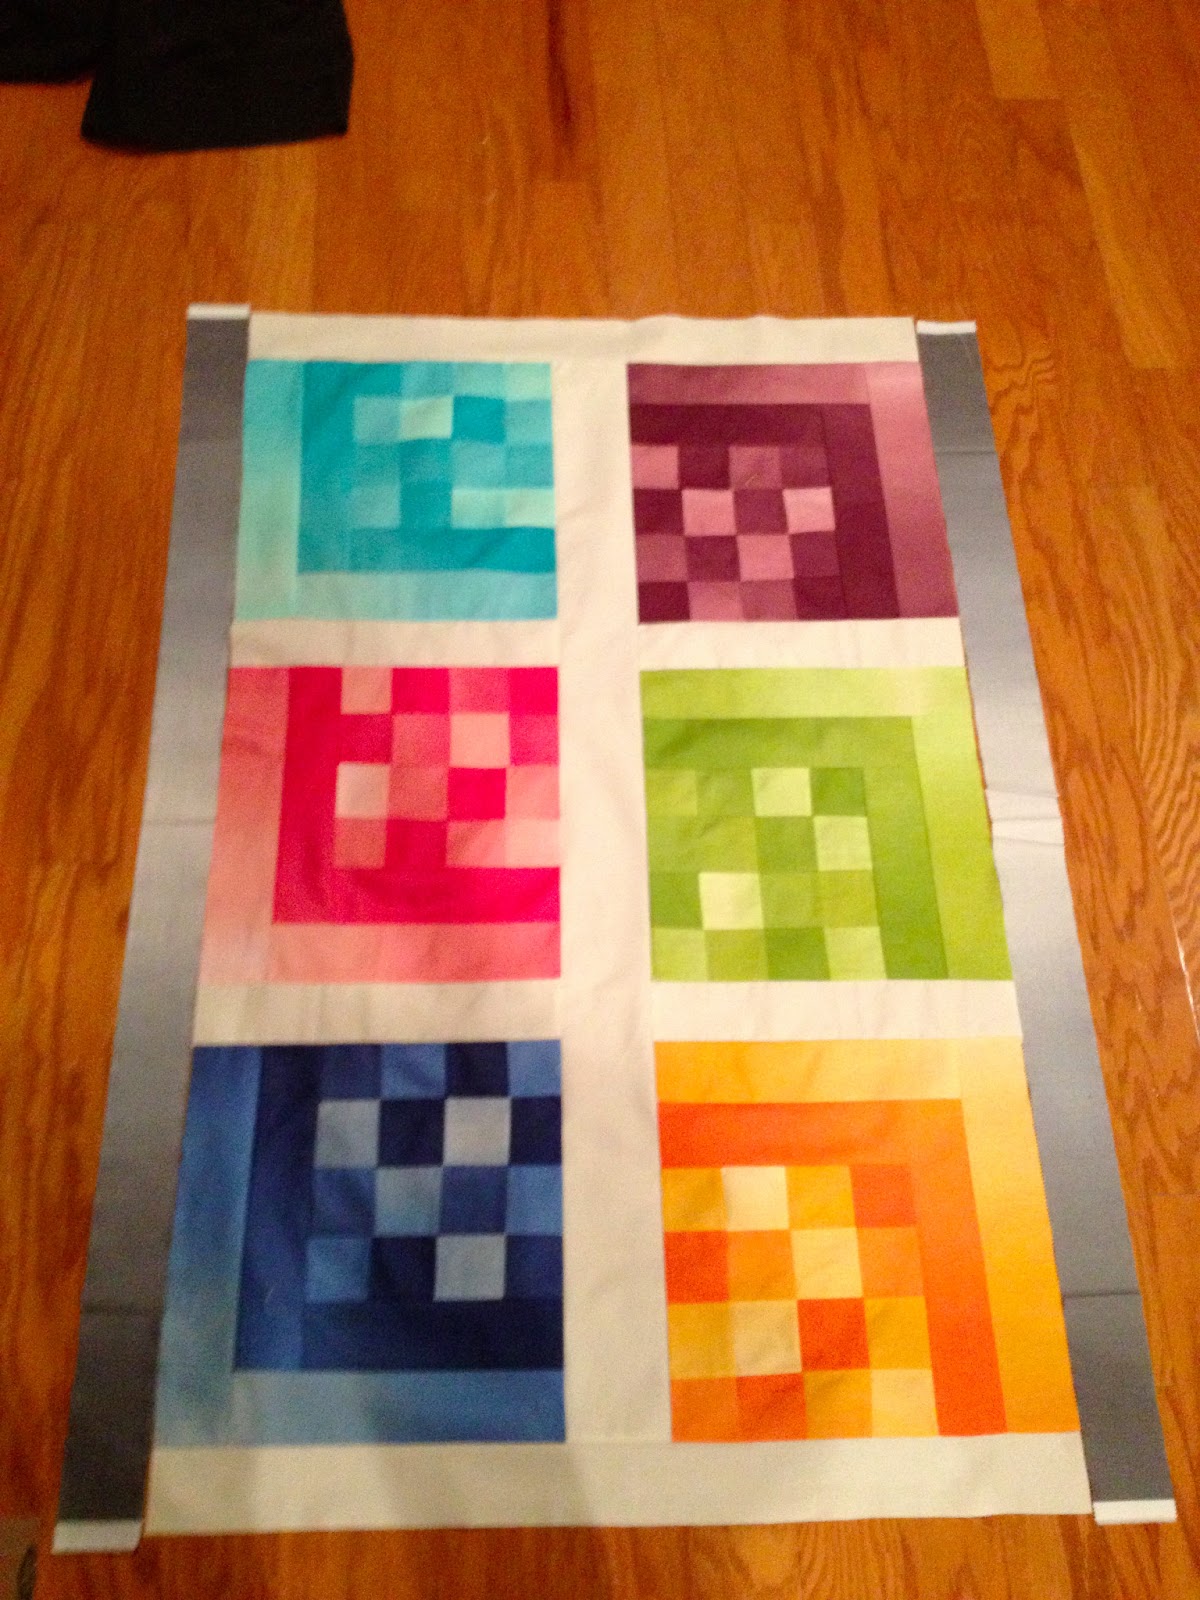
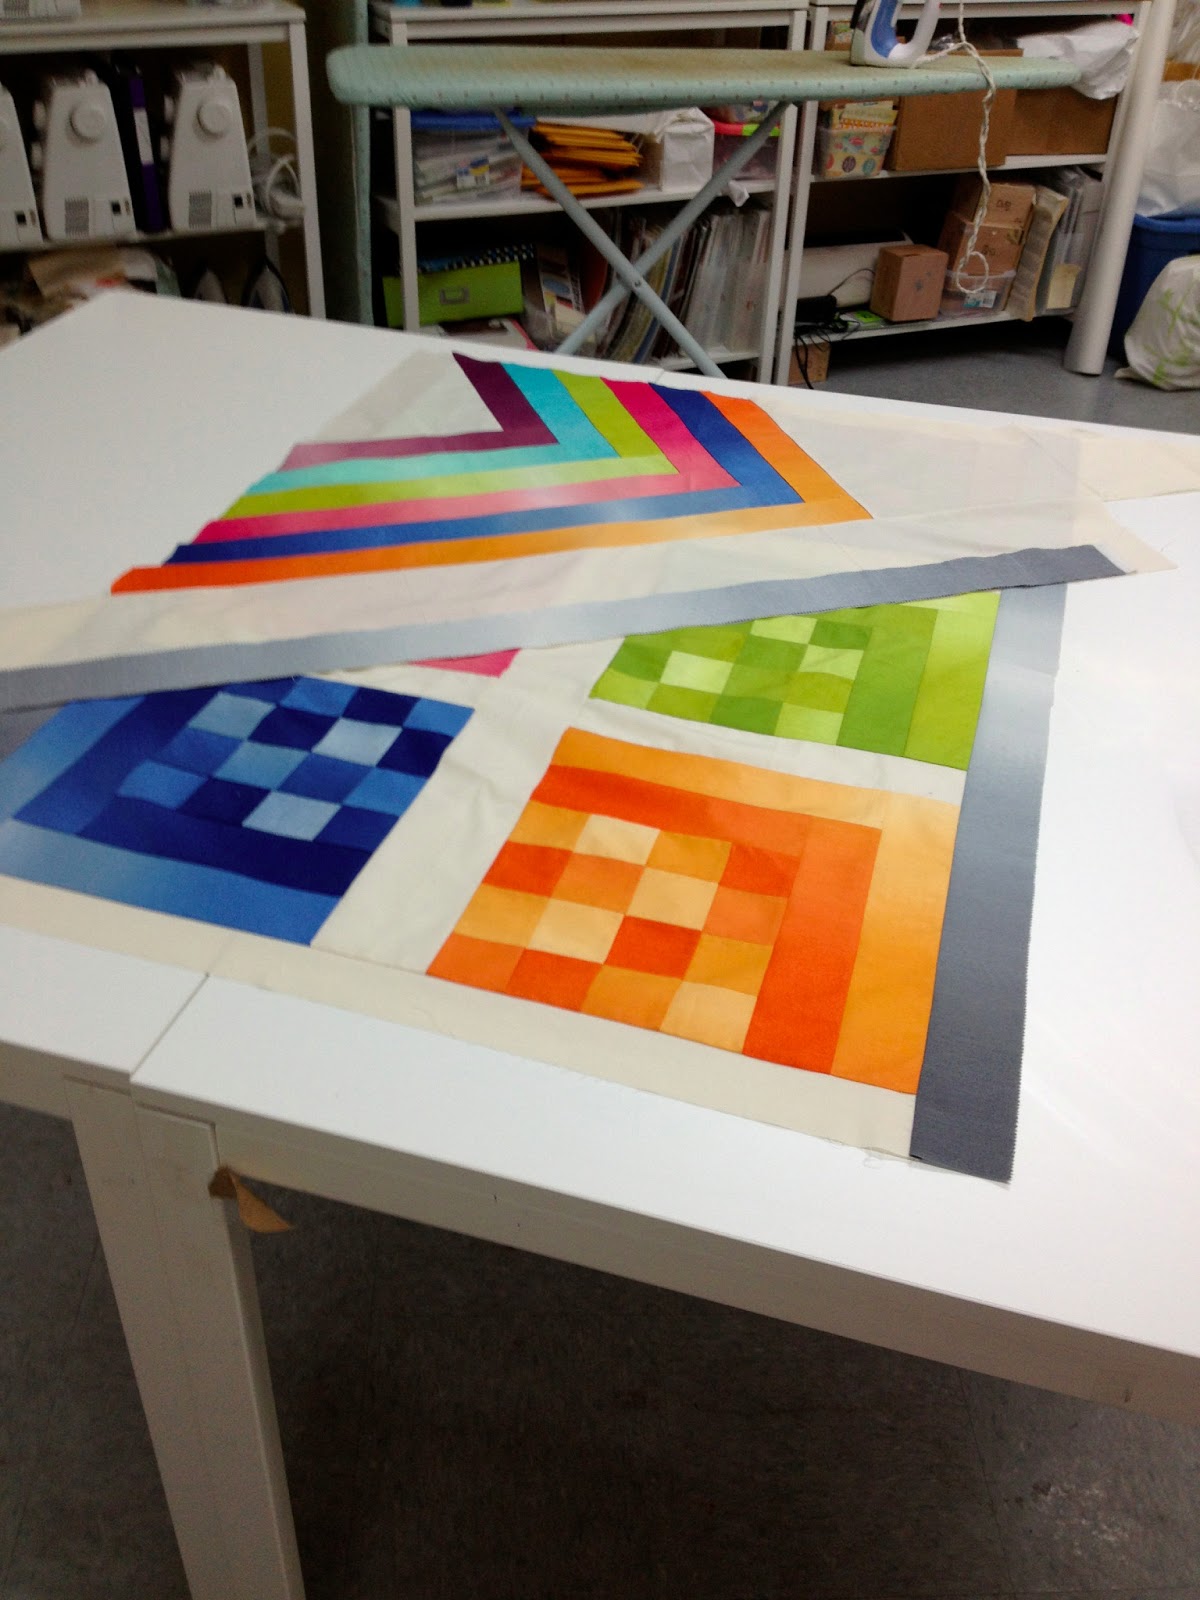
front and back
Keep in mind, all seam allowances are 1/4 inch.
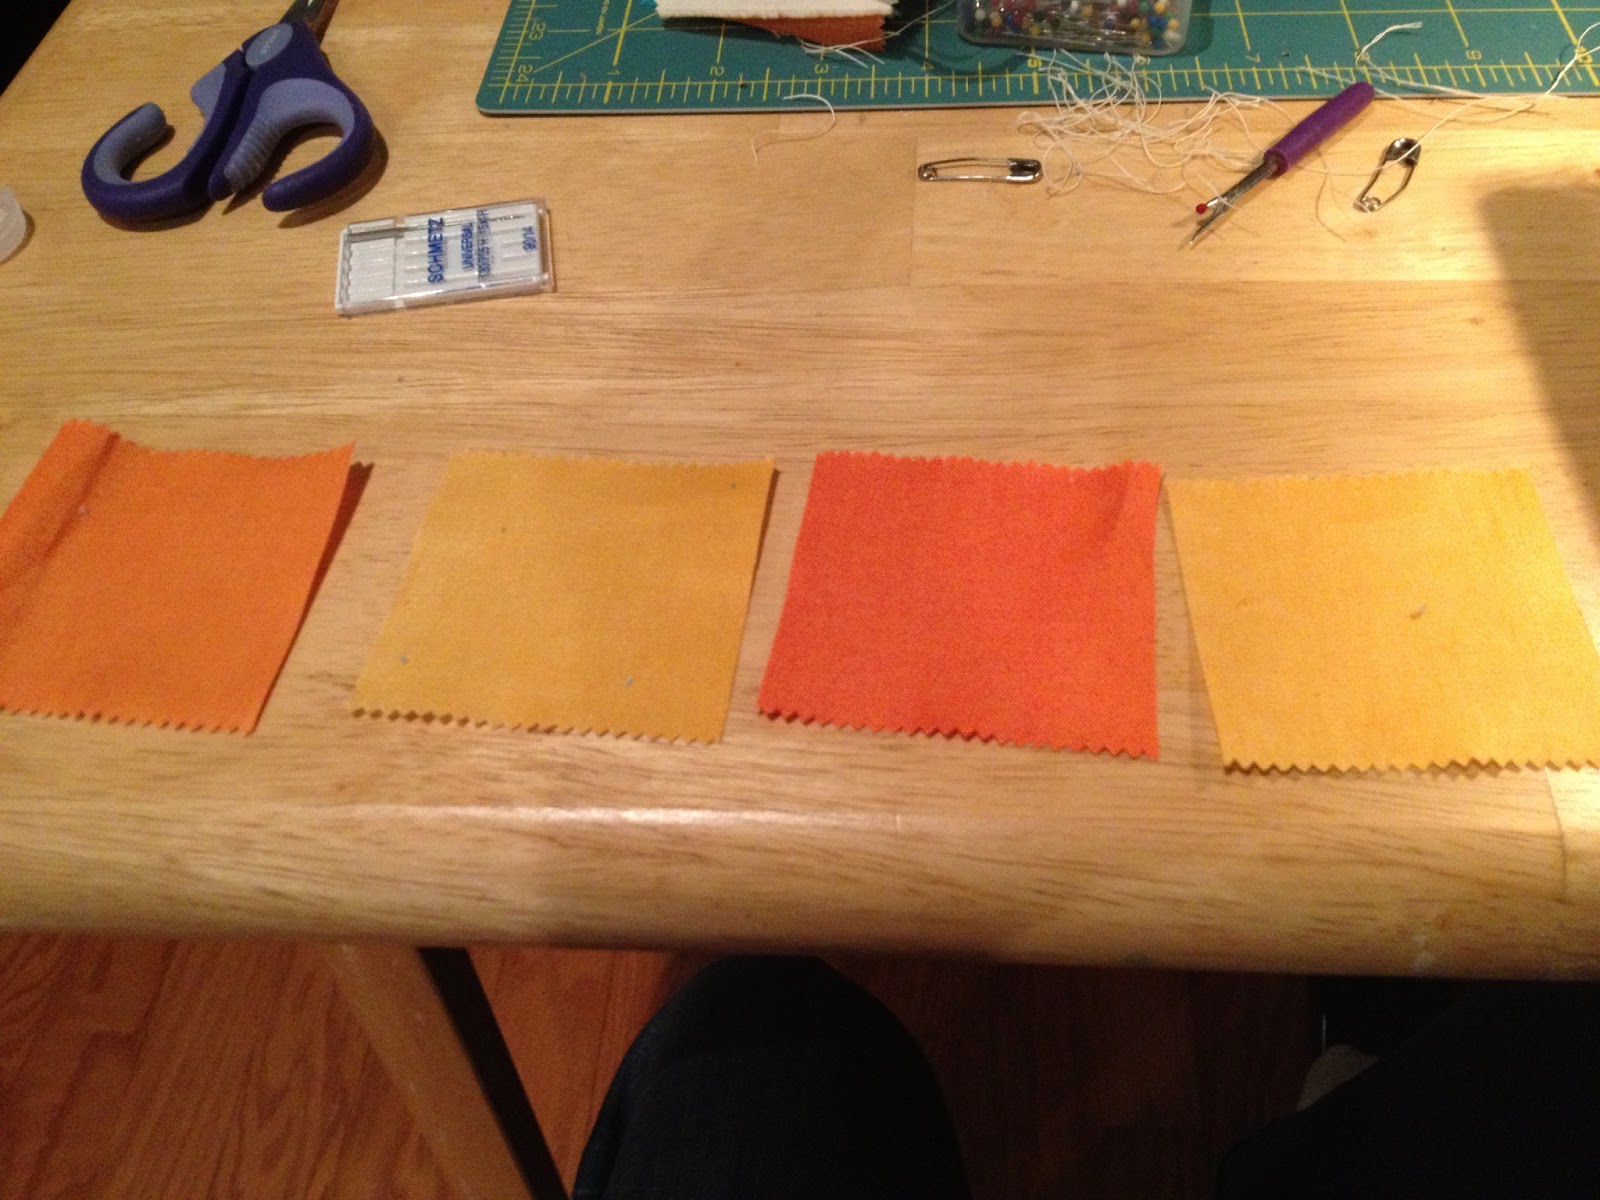
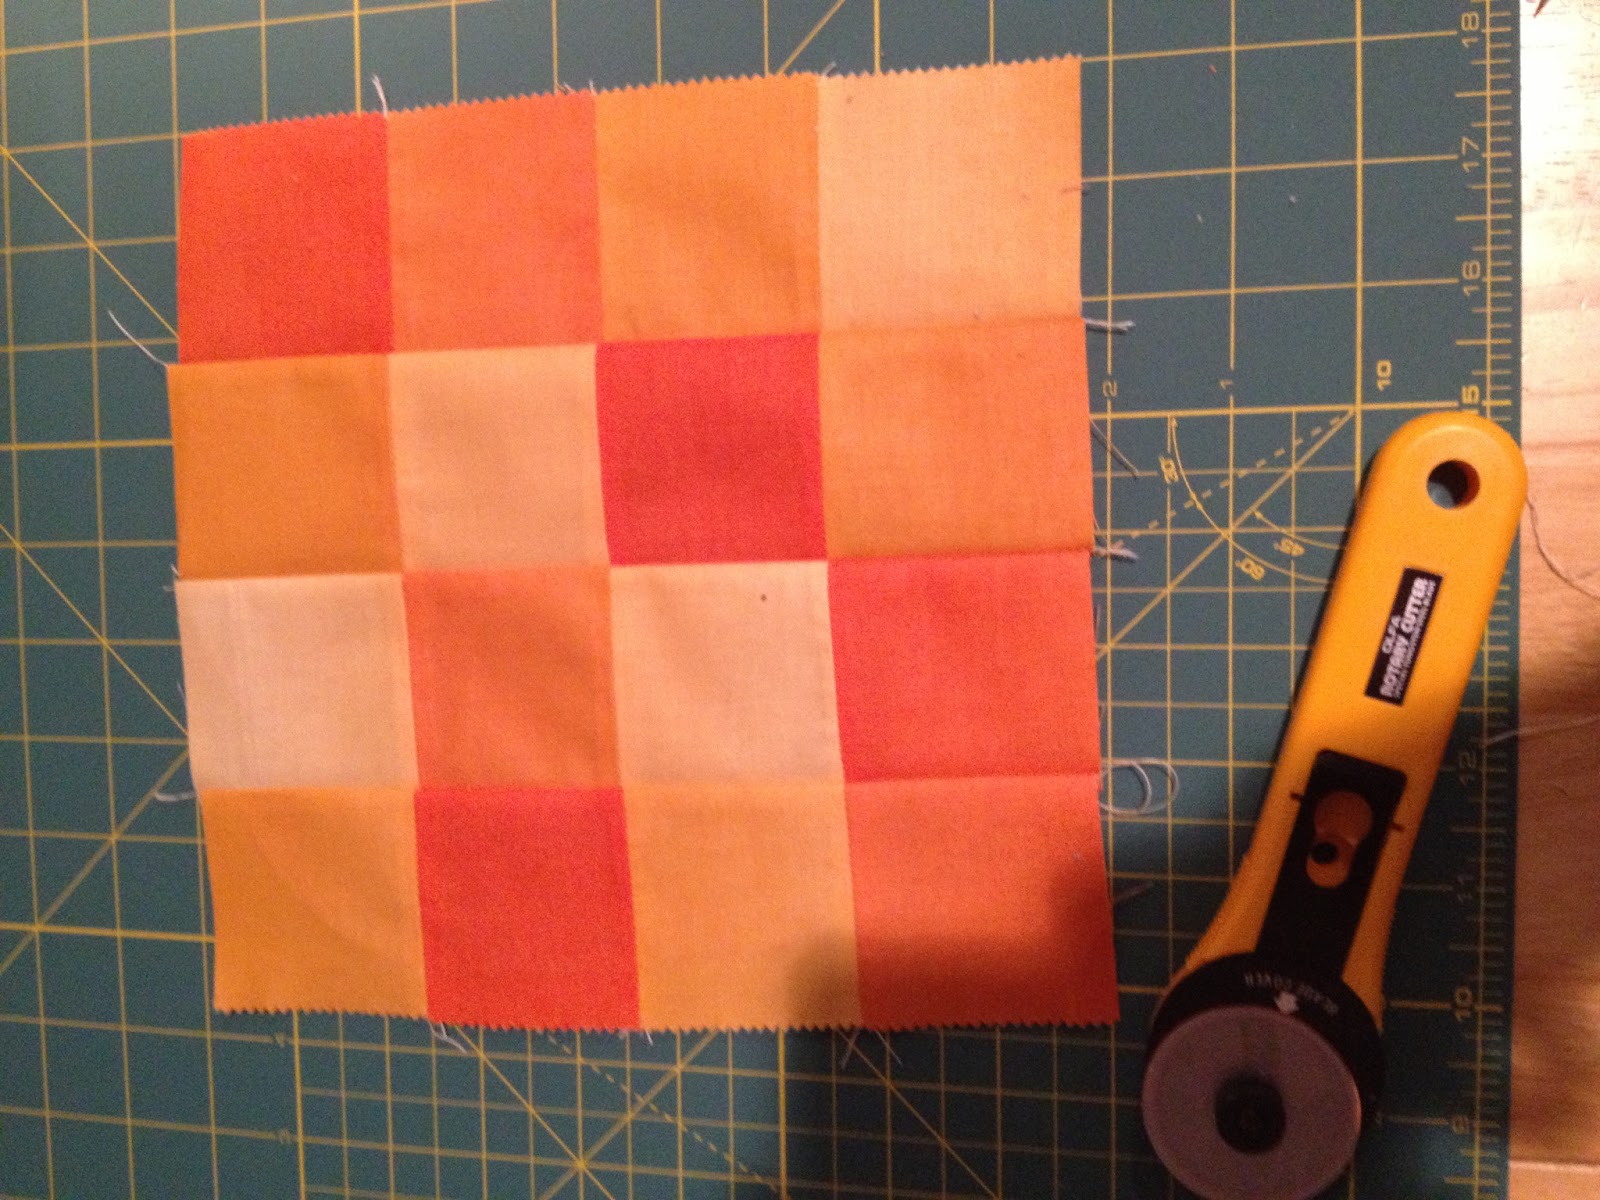
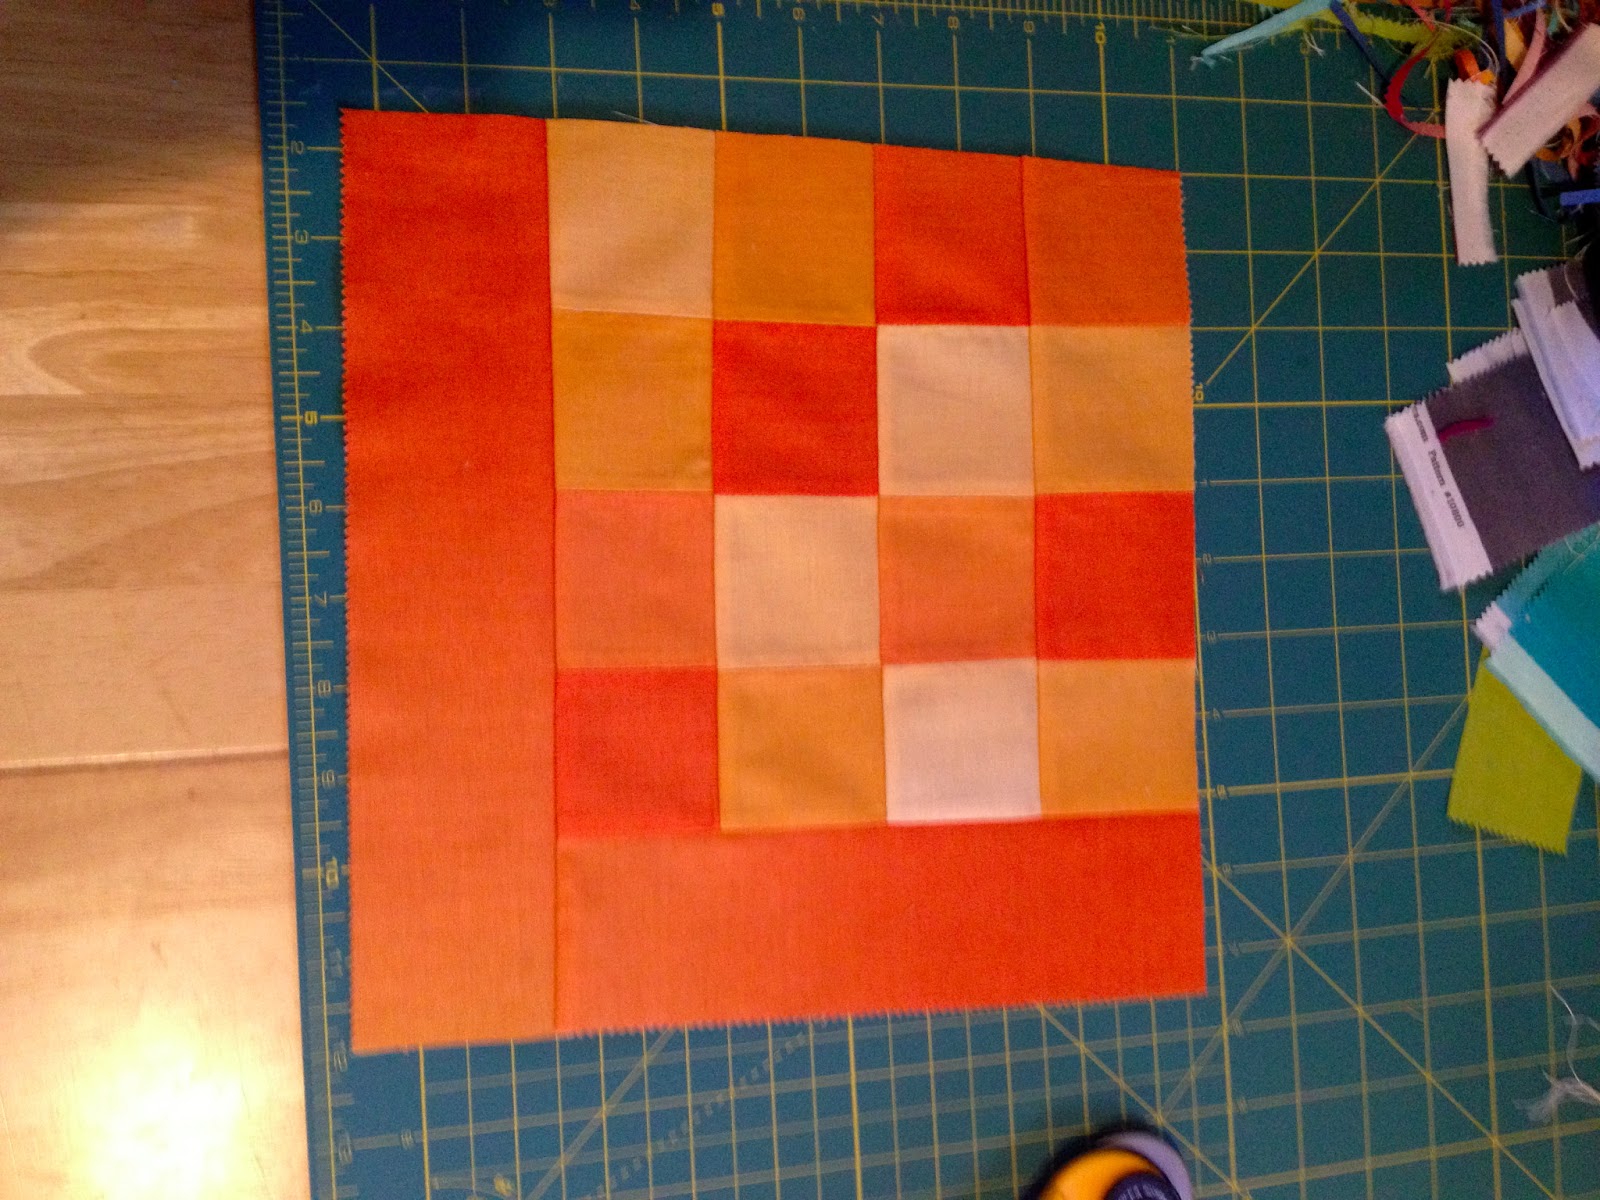
First, take a strip and cut it into 16 2.5 inch squares. (Each strip should yield 17 squares, so you can pick your favorite 16.) Arrange them in a way that mixes light and dark squares and sew into four rows of four squares each. Press.
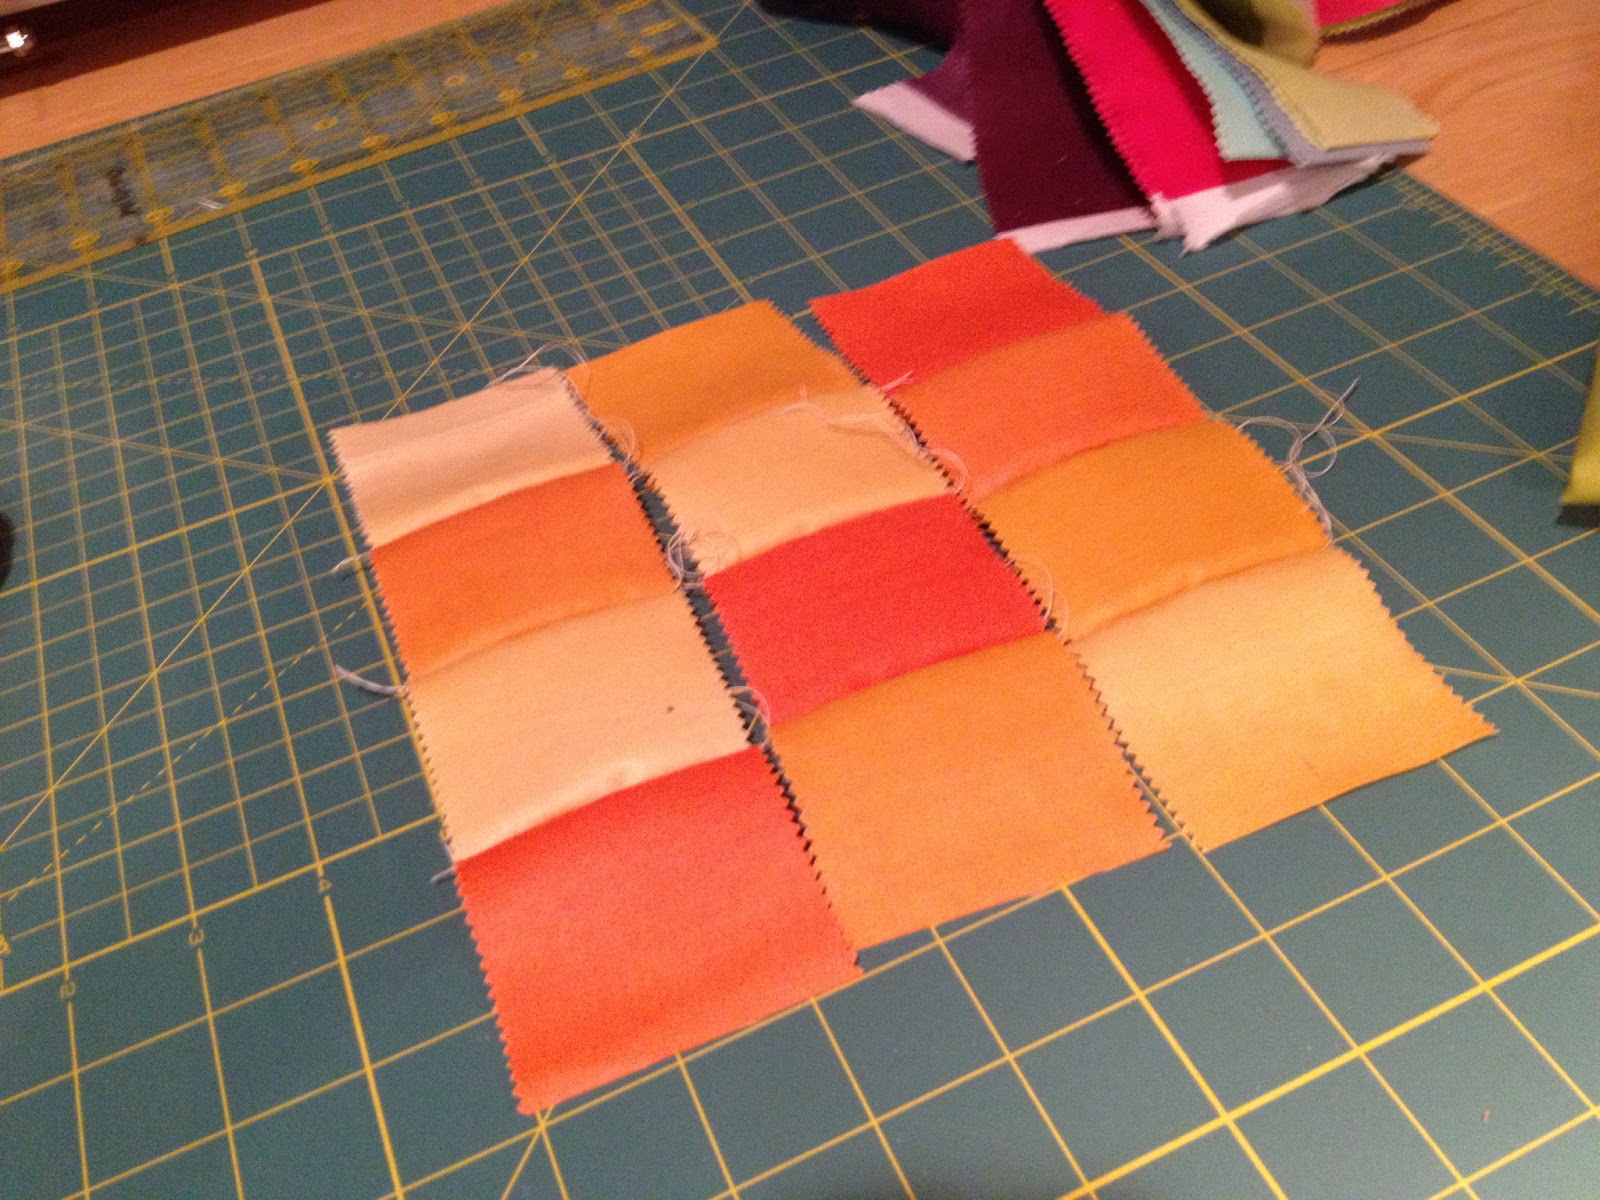
If you arrange them so that the pre-cut edges are sewn together first, you have a better chance of matching seams in your patchwork (I learned this after two blocks–I’m not exactly a perfectionist).
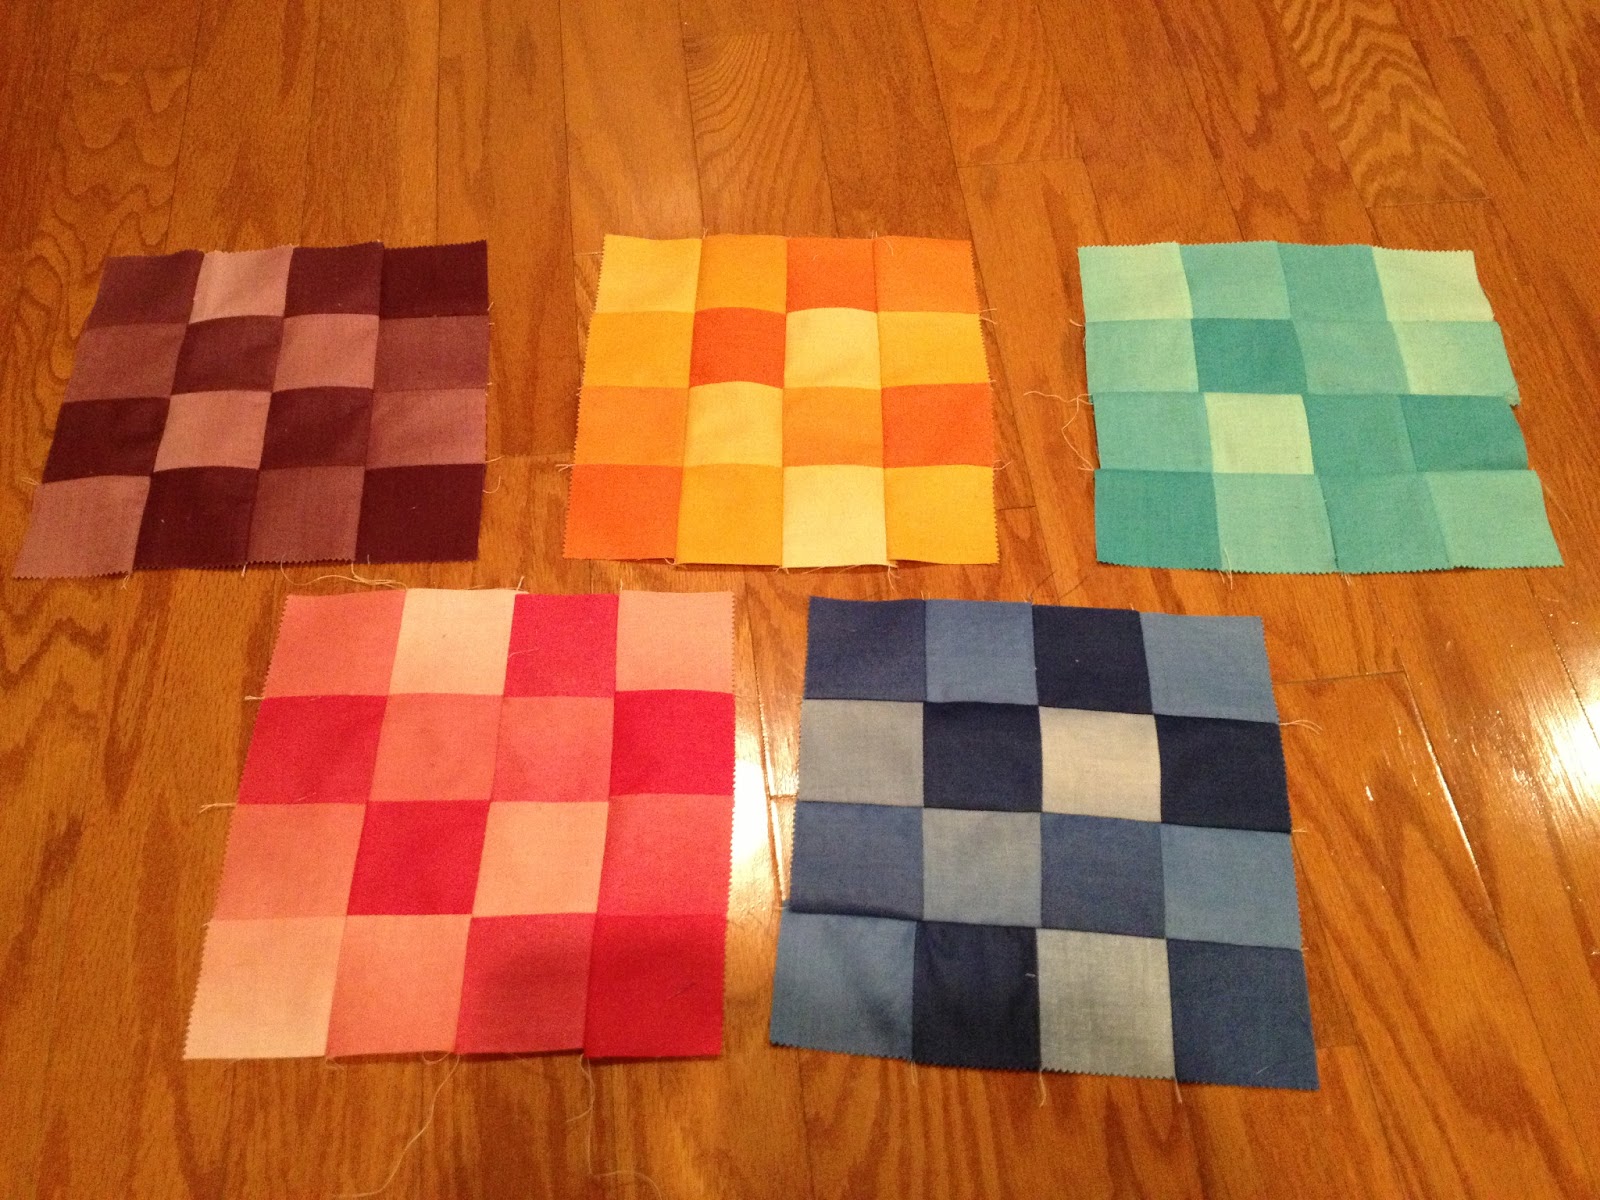
Next, pin and sew your rows together to make a block. Repeat for each color. Press. You should have six 8.5 inch squares. Repeat for each color.
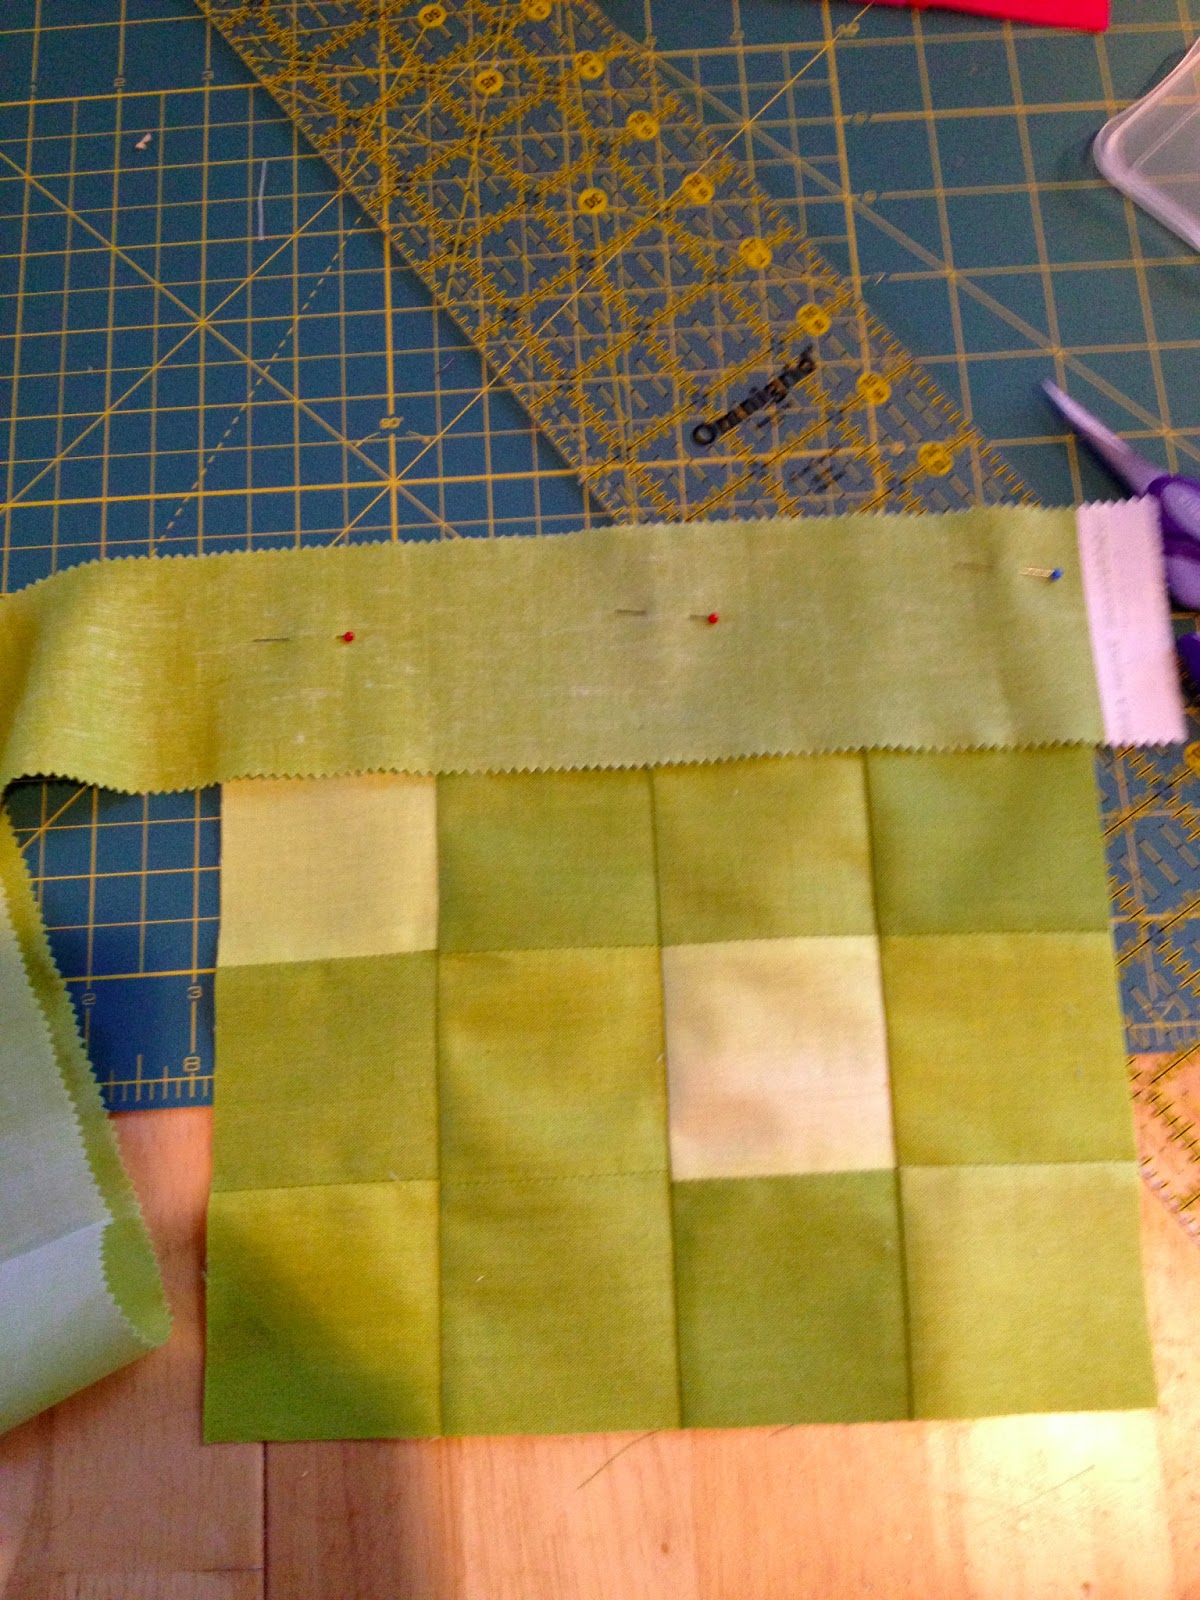
Next, pick a strip of each color to make the border angles. I used a log cabin technique, but only on two sides of each block.
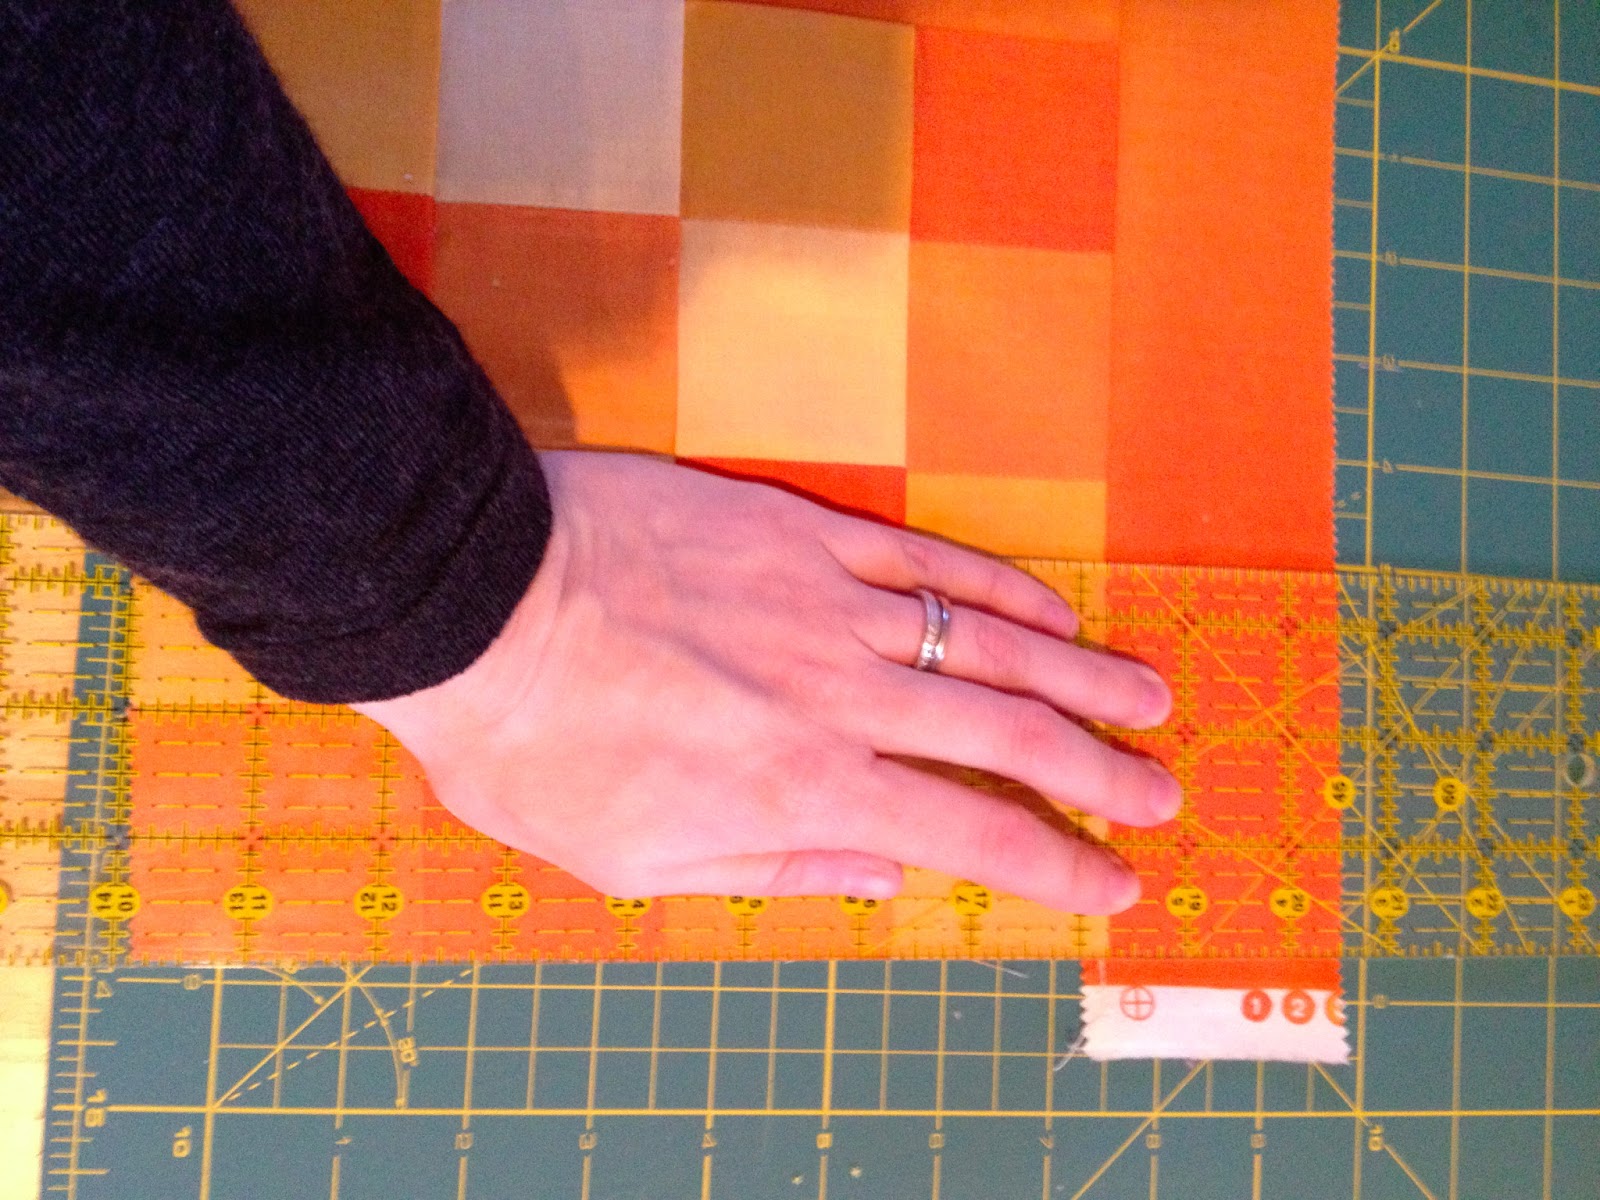
Line up one of the saturated ends to the patchwork block of the same color, pin and sew it to the side of the block. Don’t cut the strip until you’ve sewn it, and try not to stitch far past the blocks onto the strip– you’ll be trimming as you go.
Press and trim the strip to the width of the block.
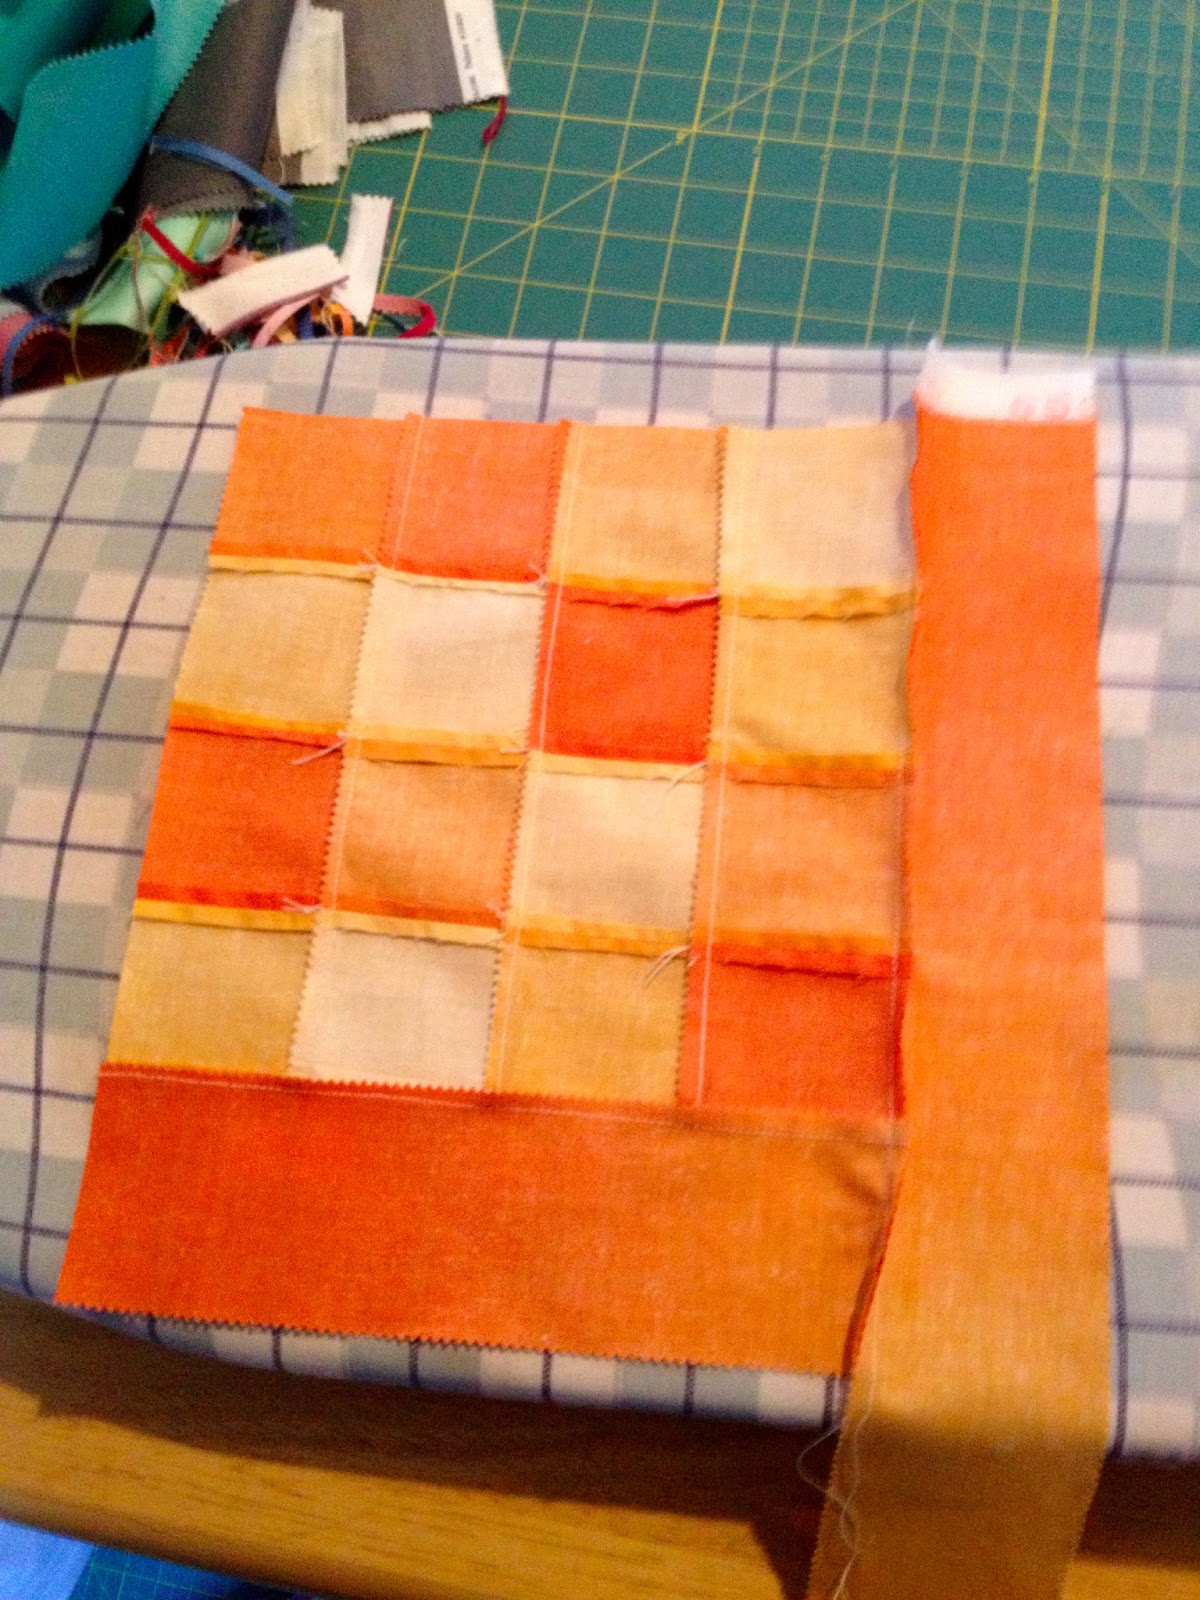
Then match the other saturated side to the corner opposite the one you started at. We want the lightest parts of the ombre to meet at the corner. Pin and sew the second saturated piece, then press and cut the same way you did with the first.
See how the corner is lighter than the edges of the angle?
Return to the first side, lining up the lightest part closest to the corner where the strips meet. Press and cut.
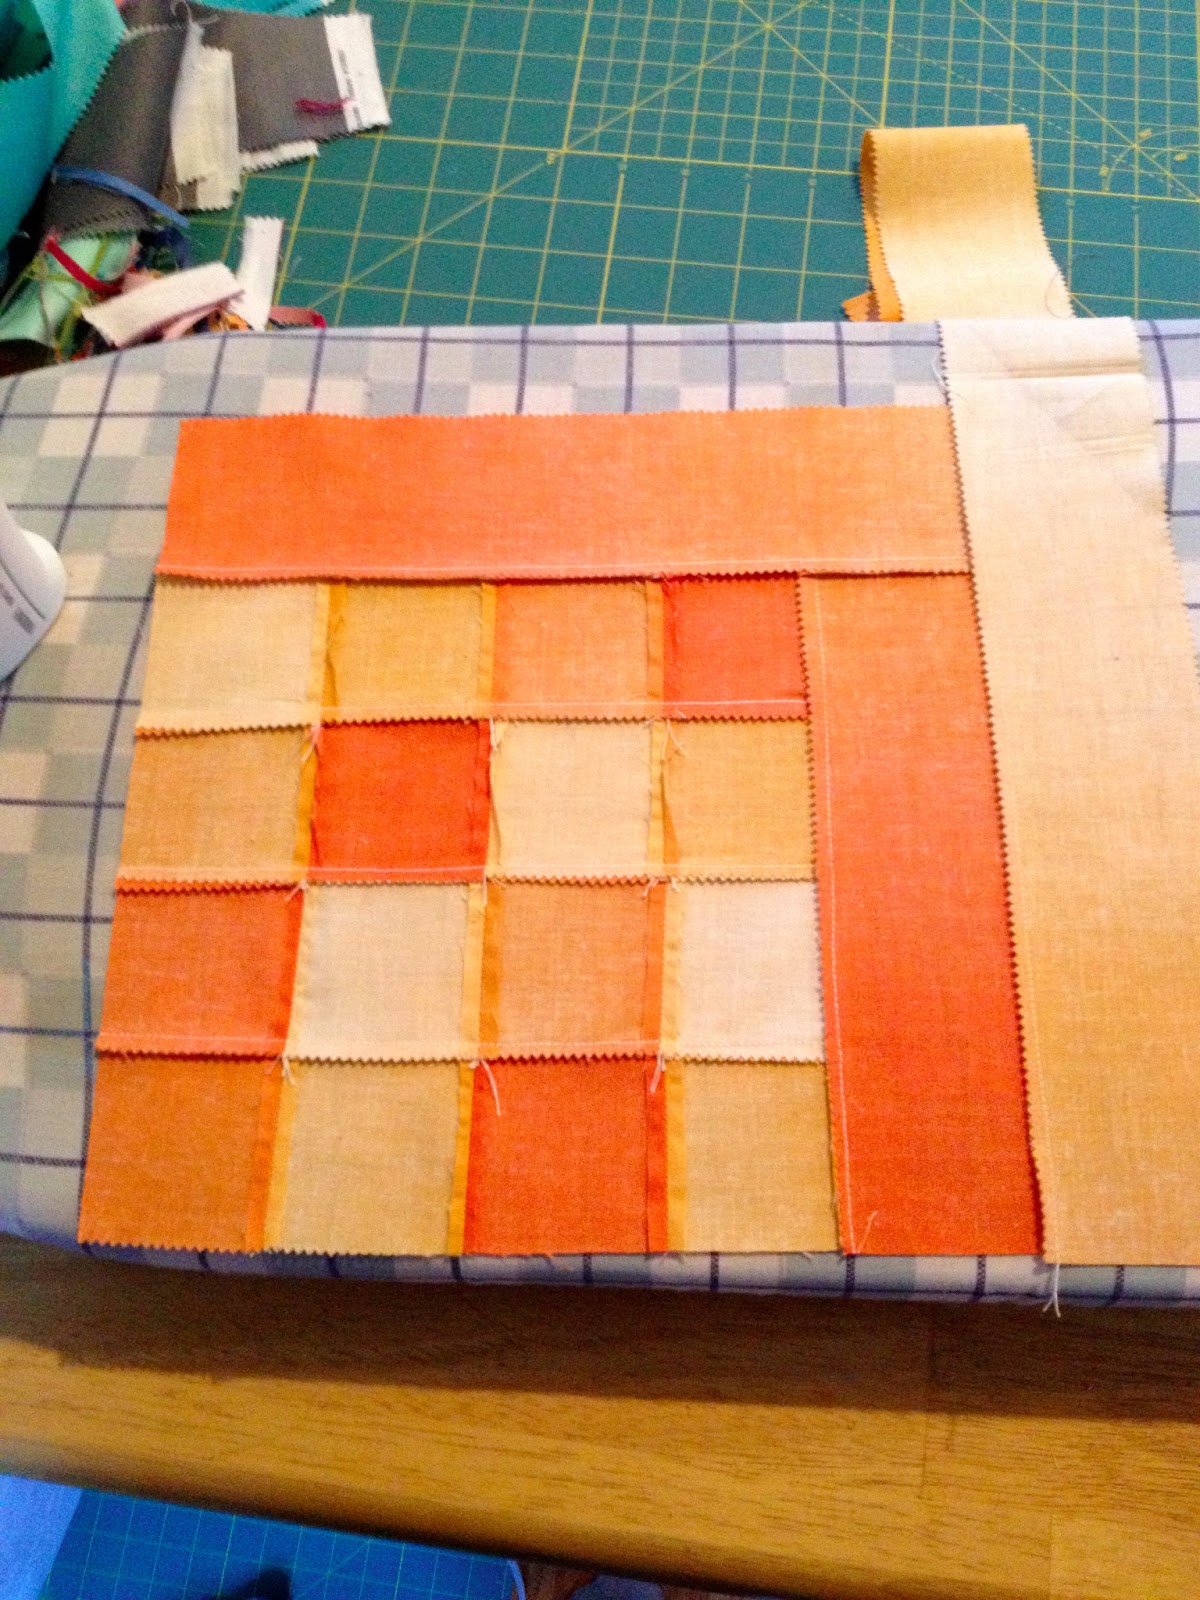
Pin, sew and press the fourth and lightest piece. Repeat for the rest of the patchwork color blocks.

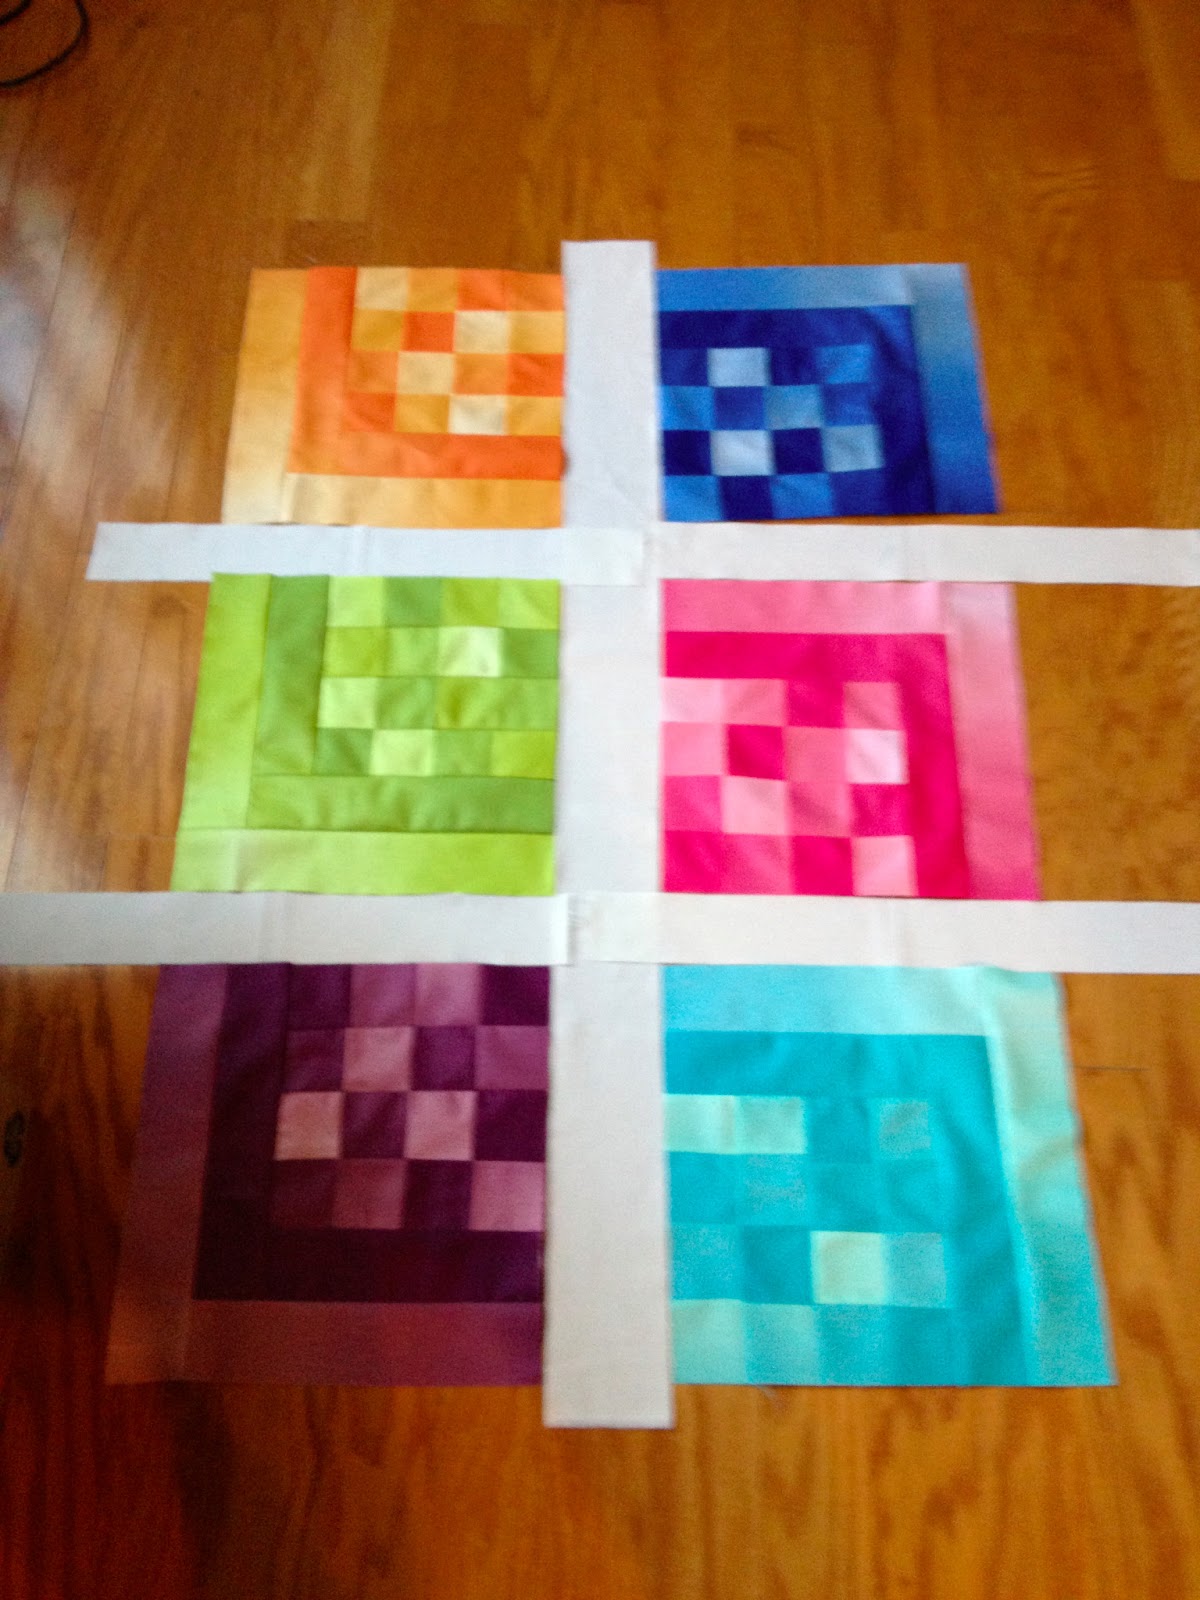
Arrange the blocks in a way that looks good to you. I mixed up the warm and cool colors and put complementary colors close to one another. I also rotated the blocks so that one column’s angles pointed up and the other pointed down.
Next, cut four 2.5 x12 inch pieces of the neutral solid and one piece measuring 3.5 inches and width of fabric. Sash a 2.5 x 12 inch piece of your neutral solid between each column of three blocks. Press and trim any spare sashing. Next, pin and sew the columns to the large sashing strip. Press and trim.
Finally, take two of the gray ombre strips and sew them to the vertical edges of the quilt top. Press, admire and set aside for later.
You can add more solid to make the sashing wider or add width or length according to the size of the finished quilt you’d like. (Also, trim the selvedges off the gray strips before you take photos. I didn’t.)
For the back, I used a more improvisational style. I cut a ten inch square of neutral solid and used the ombre corner technique to make right angles with the remaining color strips (one of each color), keeping the strips long. I regularly laid the back over the top to make sure that the ends would cover the back, and also that the positioning was the way that I had envisioned. (Obviously, never trim the backing when it is resting on the top. I didn’t do it this time around, but sometimes when I get in the quilting zone, I make mindless mistakes.)
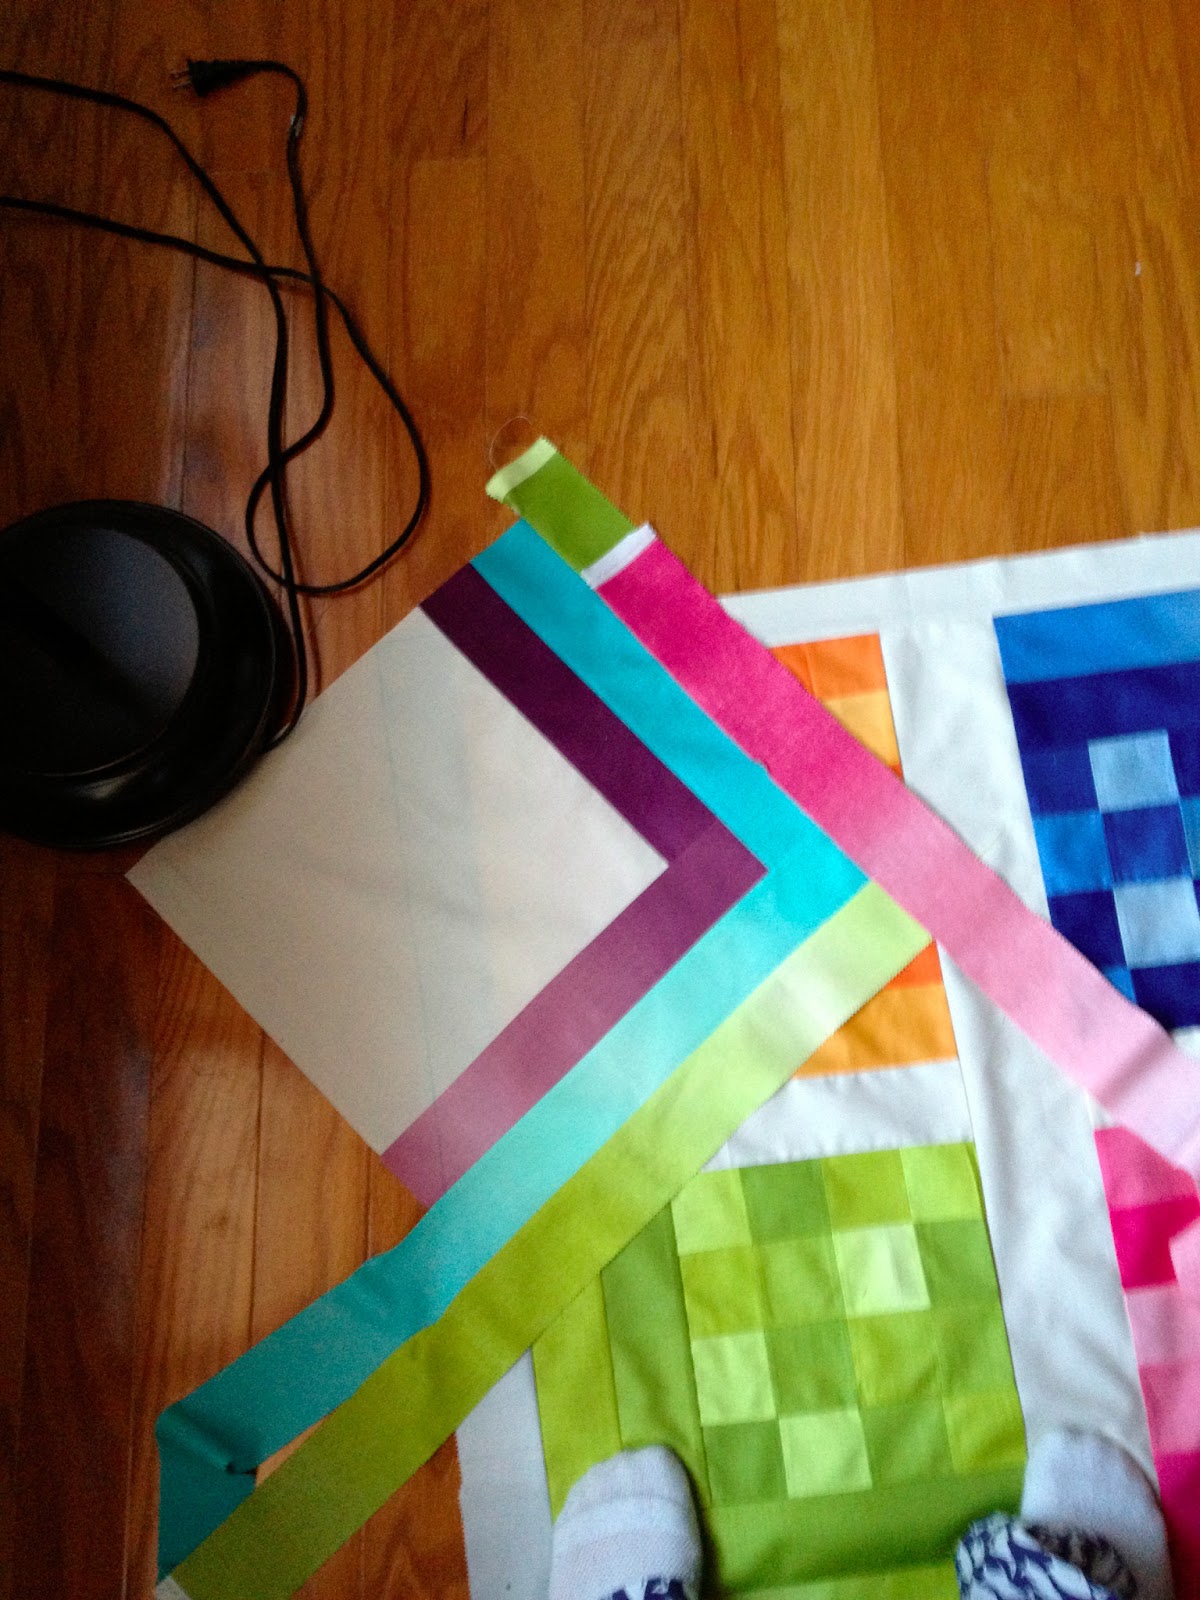
Next, I sewed a 1.25 yard piece of neutral solid along the bottom and lined it up with the quilt top to make sure that everything would be covered.
I trimmed the fabric to make an offset angle (this was inspired by Alissa Haight Carlton’s Pink Greater Than quilt ) and slashed a straight parallel line about five inches below the angle to break up the negative space. I sewed another gray strip onto the back for a modern geometric look.
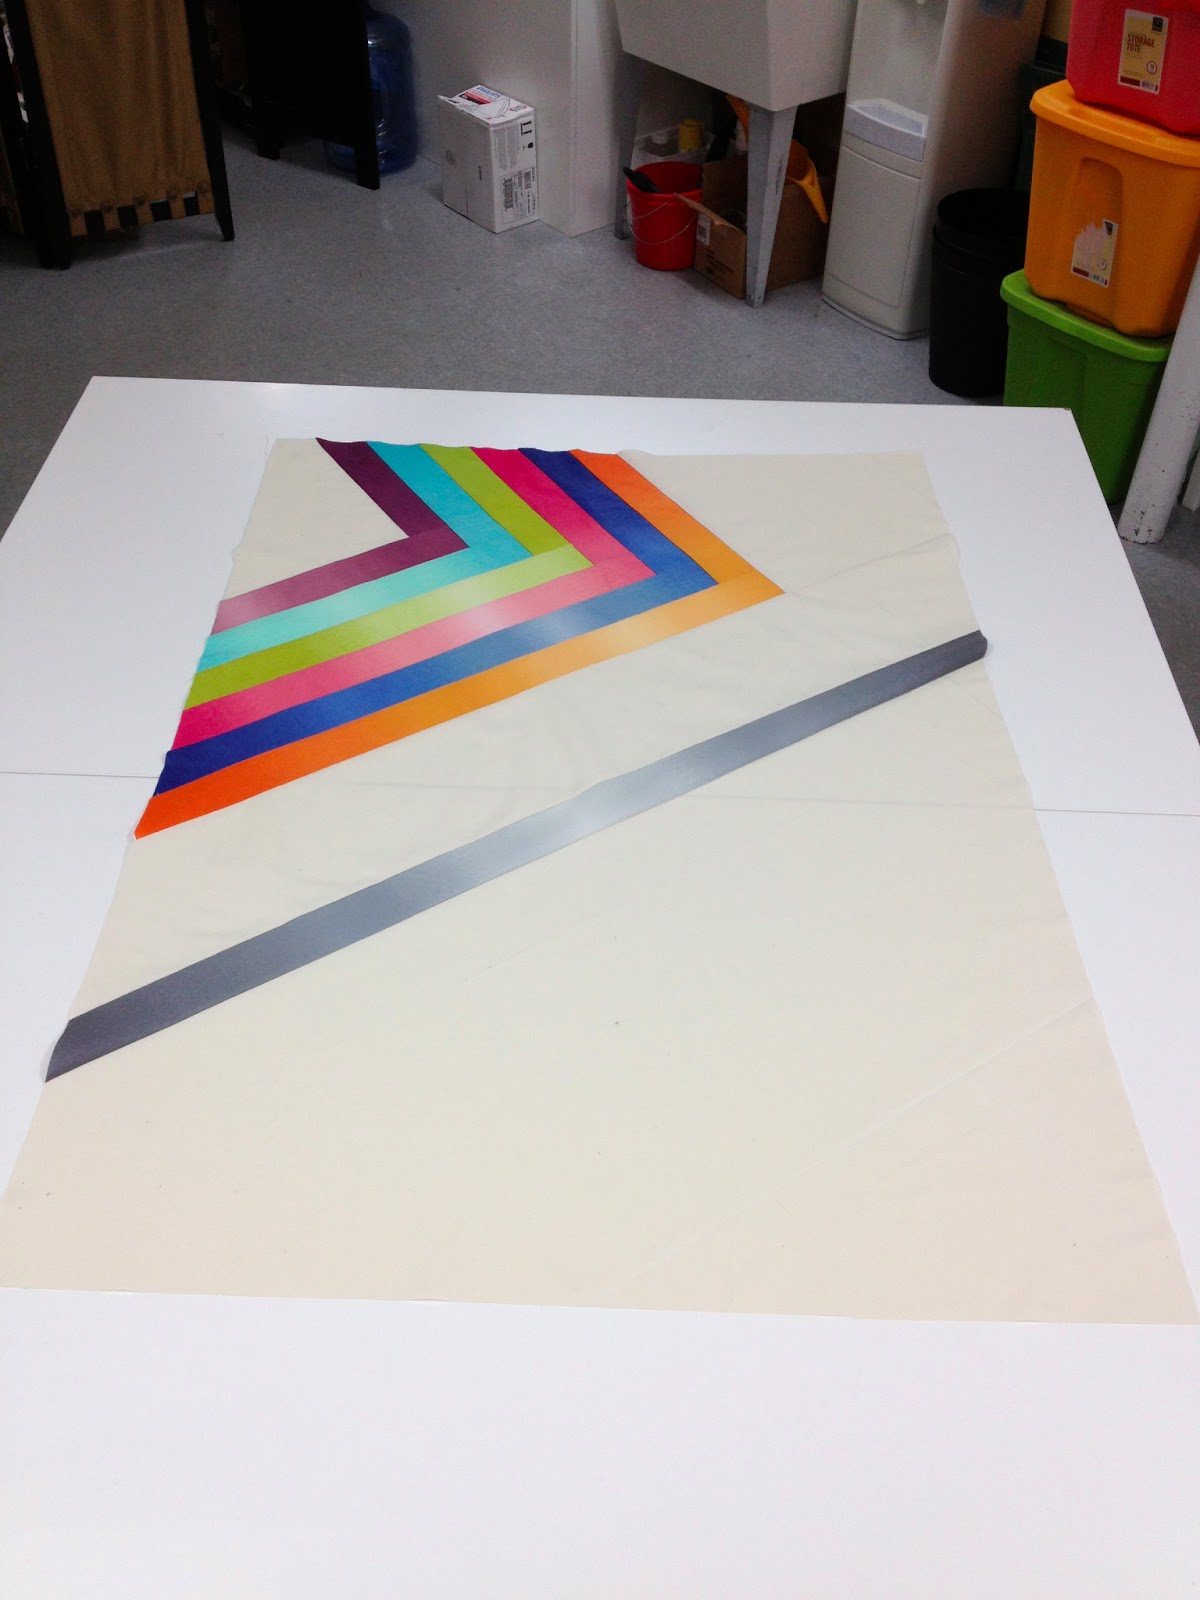
Re-align the rest of the neutral fabric and voila! You’re done!
I hope this inspired you to play around with a jelly roll of your own. Thanks for checking it out. If you decide to make this yourself, please let me know how the tutorial worked out! I’d love the feedback. And if anything confuses you, email me or let me know in the comments.
Love this, it looks almost illuminated from within. It turned out beautifully!
Thank you!
Thanks for the tutorial, this is such a fun quilt! I would love to just use the grey even.
That’s a brilliant idea. I was working with the jelly roll so it didn’t even occur to me to do it monochrome.
I am soooo into this quilt. really really. I love it.
PS – glad I’m not the only one who goes on auto-pilot and makes mistakes! ha!
Thank you so much!
Pingback: WIP Wednesday 5.1.13 | melintheattic
Pingback: Sewing Inspiration: Technicolor Quilt | Sew,Mama,Sew! Blog |
Pingback: Hello! | melintheattic
Melanie: Congrats on your post at Sew Mama Sew! And, congrats on your election as Pres of our guild. We will be in excellent hands.
Thanks Margaret! I’m really looking forward to evolving the guild activities and collaborating with members like you. Thanks for your vote of confidence.
Greatly appreciated. I was stumped on how to use the ombre beyond the patterns given by the company. Wasn’t thrilled with the prism one after two columns, so absolutely love how you used the fabric and it really brought out the ombre uniqueness
Thank you! Comments like this make my day.
Pingback: My first show | melintheattic
Right away I am going away to do my breakfast, afterward having my breakfast coming over again to read more news.